
Working with Template Tags
Here is a one-stop shop for everything there is to know about Template Tags. Template Tags pull PowerClerk data into Communications and auto-generated documents. They can also fill forms during Data Imports.
What Are Template Tags?
Template Tags are special placeholders that allow program designers to dynamically display the value of a data field in Communications, Document Templates, and other areas of PowerClerk.
For example, to include a facility’s name in a Communication or Document Template, insert a Template Tag such as {data: Facility Name} that refers to a data field holding the name. When that Communication or Document Template is generated, it will replace that bracketed text with the data field value that was previously entered by an applicant.
Note: If the data field is empty, nothing will appear in place of the template tag. To use a default value such as “N/A,” use a comma within the tag, followed by your default value. E.g.: {data: Facility Name, N/A}.
Template Tags can also be used to:
- Display the result of a Formula
- Display information about a Deadline, Status, or Milestone
- Insert a hyperlink into a Communication to directly view or fill out a form
- Access a Project’s Landing Page or Admin Page
- Import data into PowerClerk
Why Use Template Tags?
- Display info that can’t be “hard coded” into words
- Automate project specific content across all projects
- Reduce manual updates
- Avoid errors caused by outdated or hard-coded text
How to find Template Tags
Data Fields Page
Template tags are always wrapped in { } curly braces and typically use the format {data: name of data field}. However, there are other formats as explained below. To find the tag for a data field:
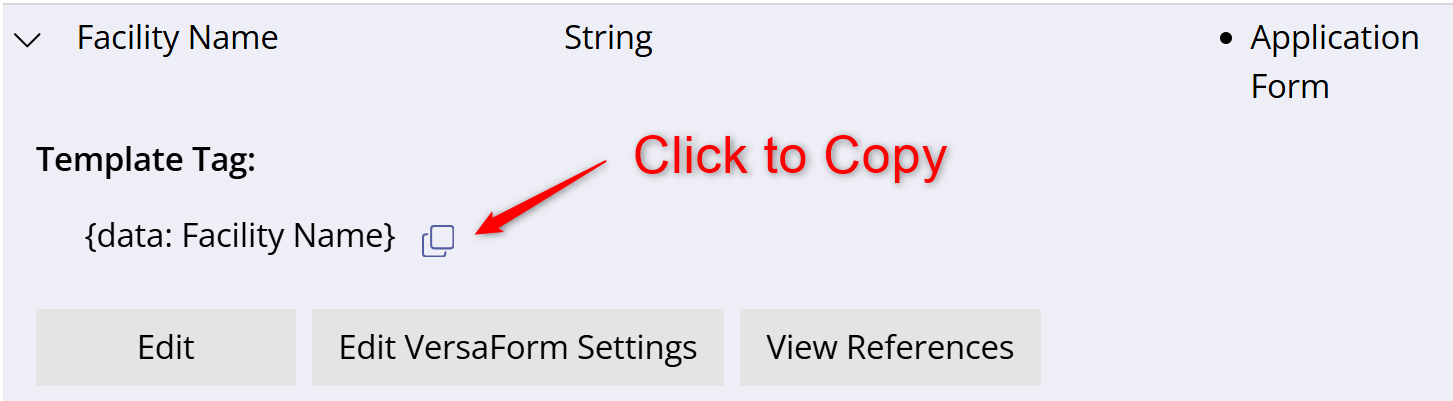
- Go to Program Design >> Data Fields and find the data field to represent, such as Facility Name.
- Click to expand the data field’s row.
- The template tag will appear. In this case it says {data: Facility Name}.
- Click the icon with the two boxes to copy.
Additional Data Field subpages
The Data Fields page has additional navigation tabs at the top for “Data Field Groups“, “Attachments“, and “Built-In Fields,” all of which have their own template tags.
Data Field Groups
Data Field Groups come in several types such as Address, Contact, Name, Table, PV and ESS Elements, Custom List, and Incentive.
Clicking on the Data Field Group will reveal the available template tags and unique syntax such as {address: Contact Address}, {name: Contact Full Name}, {table: Name of Table}, etc.
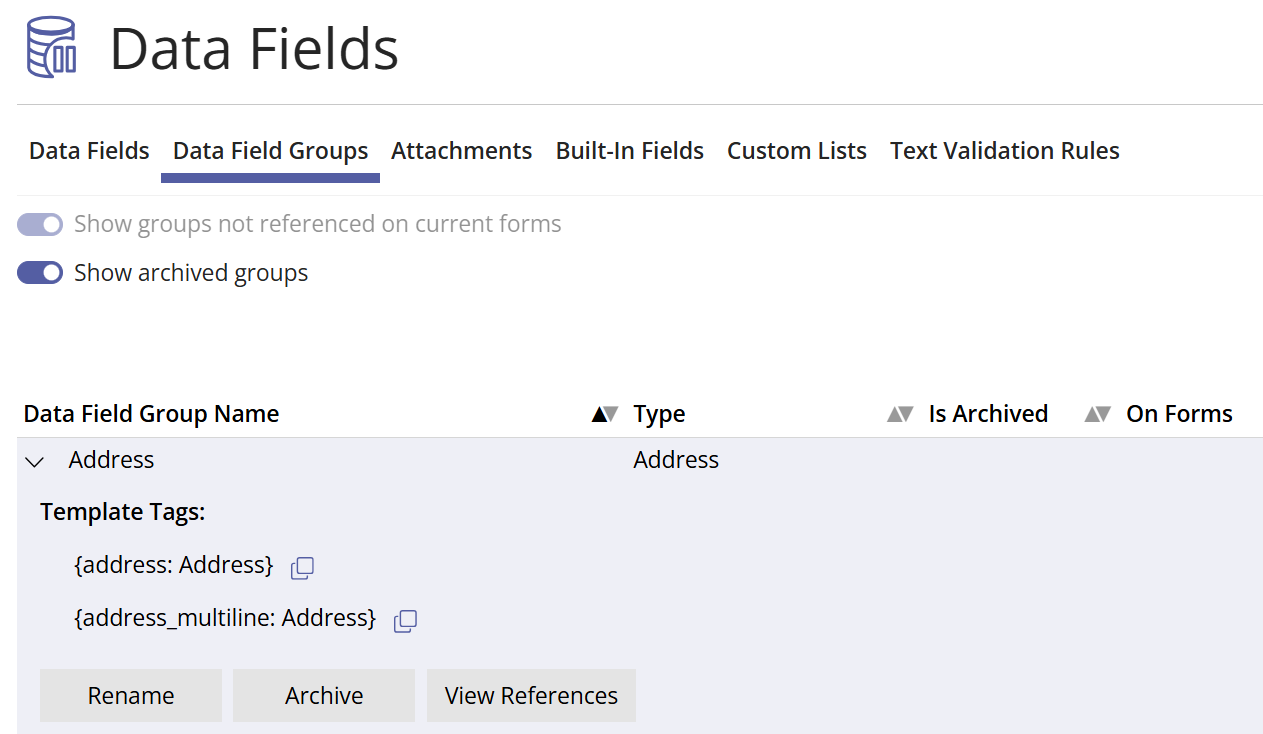
A template tag can be used for the entire Data Field Group, or the individual data fields can be used on their own. Individual tags for group components such as First Name, Last Name, etc. are found under the Data Fields list, not under Data Field Groups.
Attachments
Attachment template tags can display
- Attachment Name – {attachment_name: Name of Attachment}: the name of the file that was most recently uploaded to this attachment slot.
- Attachment Date – {attachment_date: Name of Attachment}: the date the Attachment was last submitted.
- Attachment Date and Time – {attachment_datetime: Name of Attachment}: the same as “Attachment Date” above, only the time is also added to the output.
- Attachment Note – {attachment_note: Name of Attachment}: this displays reviewer comments made using the Attachment Review feature.
- Link to Project Landing Page – {ProjectLandingPageURL}
- Link to Edit a form – {edit_form_link: name of form}
- Link to View a form – {view_form_link: name of form}
- Link to Admin page – {AdminPageURL}
- Project Owner’s email – {ProjectOwnerEmail}. This usually refers to the user who created the Project by filling out the first form.
- Project Assignee‘s email – {AssigneeEmail}
- {Deadline_time_active: Name of Deadline}: Shows how long a Deadline has been active.
- {DeadlineDueDate}: Shows the Deadline’s due date in the context of a reminder or expiration email.
- {DaysToDeadline}: Shows the Deadline’s remaining days for the Deadline to expire in the context of a reminder or expiration email.
- {DeadlineName}: Shows the Deadline’s name in the context of a reminder or expiration email.
Built-In Fields
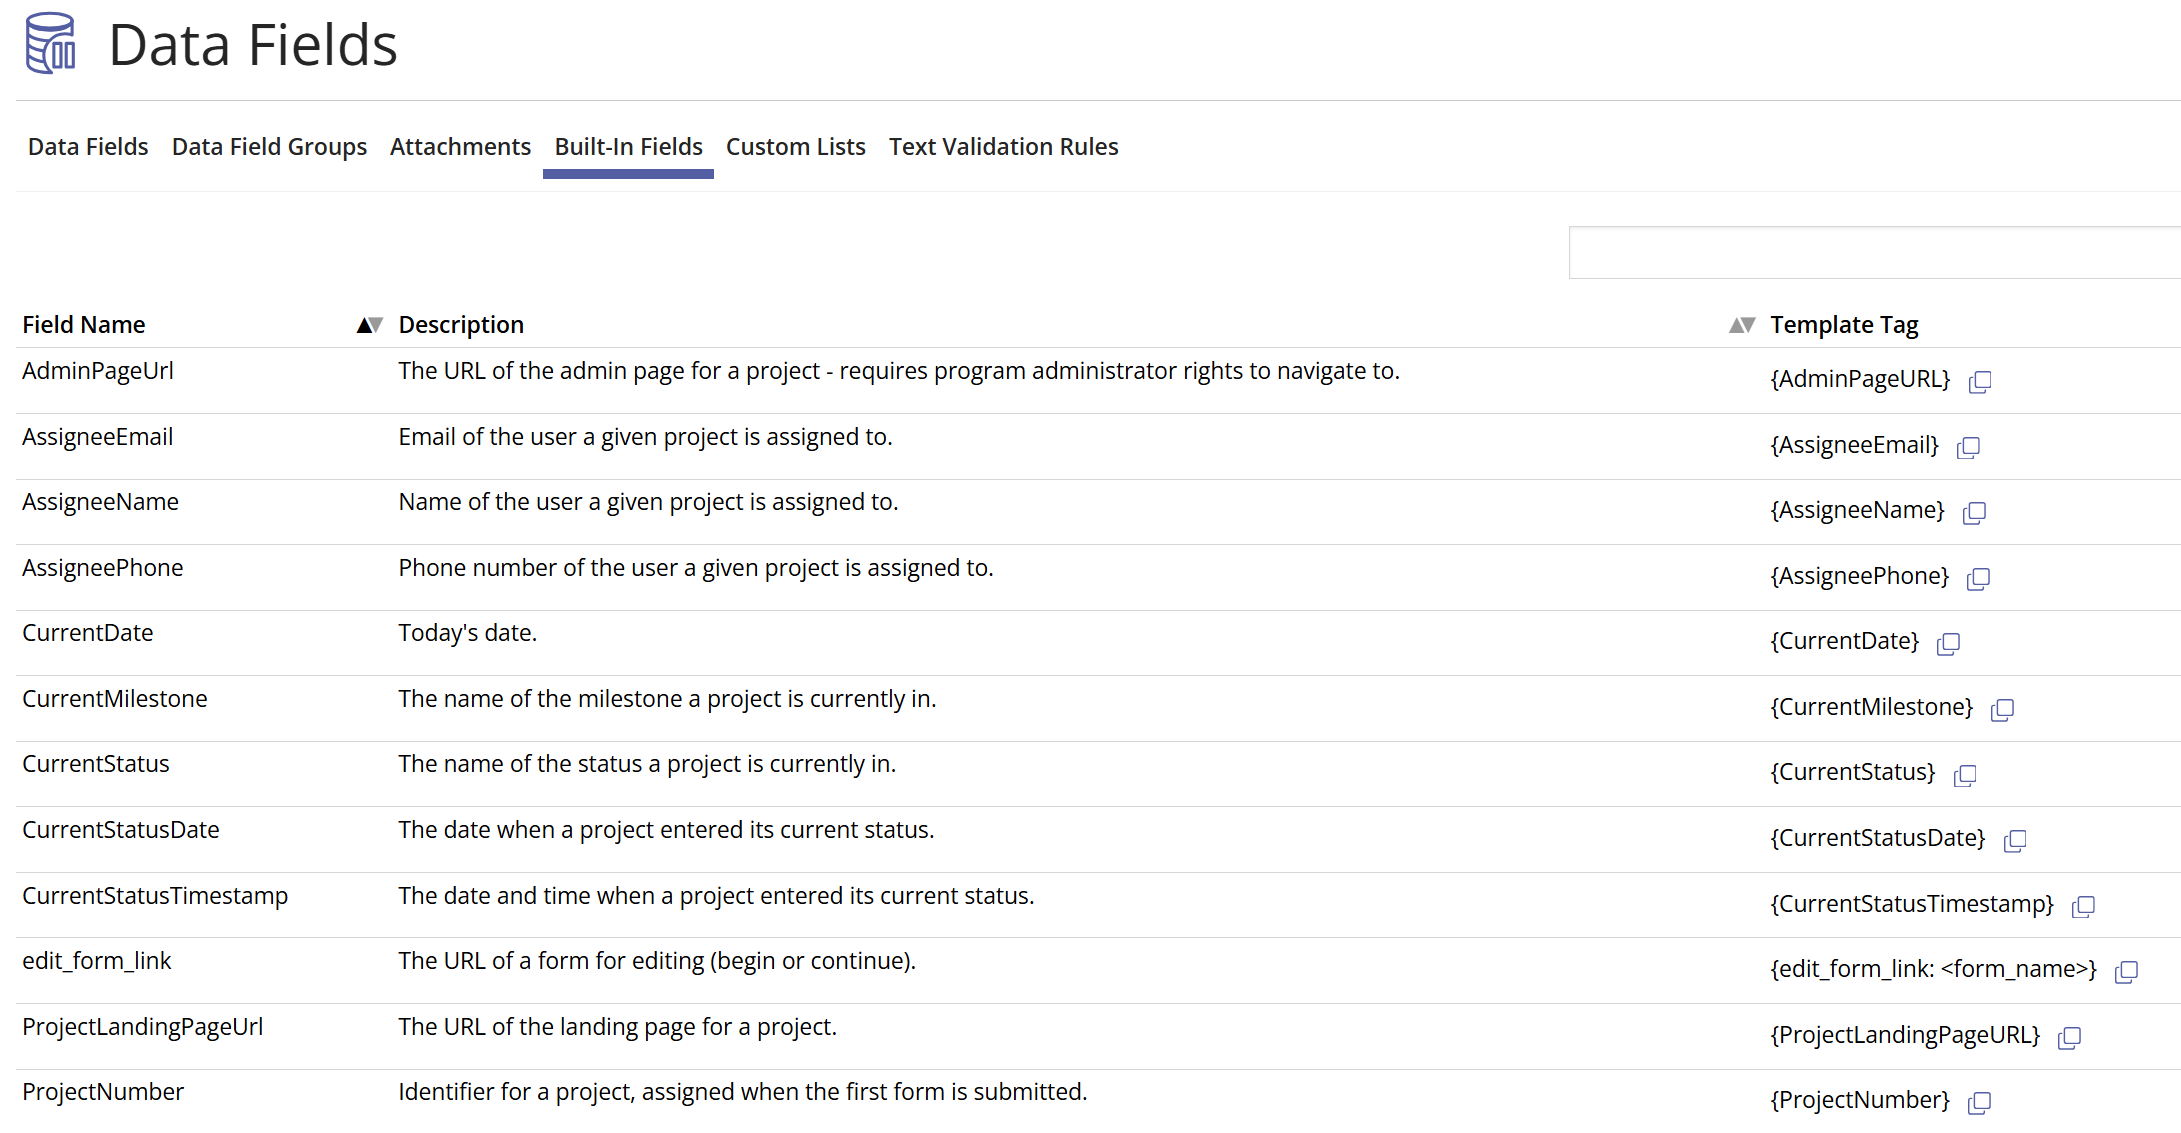
These template tags will show information that is already built into PowerClerk, as opposed to user-created data fields.
Some template tags listed in the Built-In Fields section can be used as a hyperlink URL in a Communication message body.
URL Template Tags:
These two template tags are used to fill in a built-in email address:
Note: if using a User Selector as the equivalent of a Project Assignee, use {email: User Data Field Name}
Formula Template Tags
Formula template tags will display the result of a formula in Communications and Document Templates. This can be used to show equipment calculations, study costs, etc.
These are found on the Program Design >> Formulas page rather than the Data Fields page. Click the formula name which will reveal the template tag along with other information.
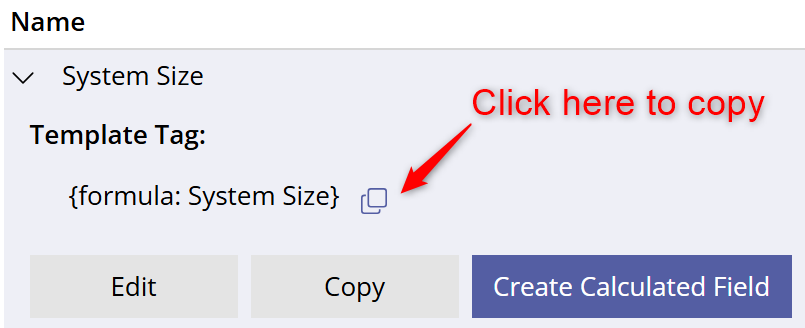
Note: Formula Template Tags cannot be used for Data Imports.
Deadlines
Deadlines have their own template tags that are used for providing up to date information on a Deadline, inside of Communication emails. Note: Deadline Template Tags will only work if the Communication email is sent as a Deadline Reminder, which is set on the Deadline’s page. They will not work if the Communication is sent through a standard Automation Action.
Deadline Template Tags include:
Use the “Send Immediately” checkbox on the Deadlines page to send a Communication with Deadline Template Tags in the same way as a standard Automation Action.
Go to Communication Templates for Deadlines to learn more about using Deadline template tags.
Example use cases
Use Case Example 1: Corrections Required (Communication Template )
Use case: update the applicant that they need to resubmit their application form with corrections.
Use Case Example 2: Review Reminder Email (Communication Template )
Use case: remind an internal reviewer that their deadline is approaching
Use Case Example 3: Interconnection Agreement (Document Template)
Use case: Pre-fill a legal agreement with project details so that it can be sent out for signatures.
FAQs
Have additional questions? Contact us to nominate your FAQ and help others find answers to your own questions concerning this feature.
Create A Support Ticket
Not finding your answer here? Submit a question to our support team at the PowerClerk Ticket System and leverage the PowerClerk team’s expertise.