PowerClerk Support Center

Program Design
Automations
Questions to Ask
Locating the Automations feature
How to create an Automation
Automation Triggers
Automation Action Rules
Validation Rules
Scheduled Triggers
Troubleshooting Automations
FAQs
Channels
Questions to ask yourself
Locating the Channels feature
What are Channels?
Types of Channels
Channel Type: Mark as Child
Channel Type: Make Successor
Channel Type: Create Related Project
Channel Type: Submit Related Project
Channel Type: Project Lookup
How to create a Channel
Channel Signals and Automations
Using Channels in Test Environments
FAQs
Communications
Questions to ask yourself
Locating the Communications feature
Creating Communication templates
Finding Data Tags
Bulk Communications via Data Import
Images in Communications
Project Attachments and Content Library Items
Smart Templates
Upgrading to Smart Templates
Upgrading when a Test Environment Exists
Broken Template Tags
Examples of Broken Template Tags
PowerClerk Bulk Email Communication Policy
FAQs
Connections
Questions to ask yourself
Locating the Connections feature
What are Connections
How to Create a Standard Web Adapter
Define Input and Output Fields
Connecting, Testing, and Enabling the Web Adapter
Creating a Standard Web Adapter Configuration
Utilizing Connections on PowerClerk
Maintaining and Editing the Web Adapter
Web Adapter Message Type Format
Supported Message Versions
Error Handling
Custom List Lookup
Create a Custom List Lookup
Utilizing Custom List Lookup
FAQs
Content Library
Questions to ask yourself
Locating the Content Library feature
Uploading content to the Content Library
Use with Communication Templates
Use for Front Page content
FAQs
Custom API IDs
Questions to Ask
Locating the Custom API IDs feature
How to edit a Custom API ID
FAQs
Data Fields
Questions to ask yourself
Locating the Data Fields feature
How to work with Data Fields
Custom Lists and Data Field Groups
Table form element
PV System + batteries element
FAQs
Deadlines
Questions to ask yourself
Locating the Deadlines feature
What are Deadlines
How to Create a Deadline
Deadline Automation Action Rules
Utilizing Project Admin Page for Deadlines
Communication Templates for Deadlines
Deadline Set/Satisfy Options
Program-Wide Deadline Actions
Reporting on Deadlines
Deadlines in Project List Columns
FAQs
Document Templates
Questions to ask yourself
Locating the Document Templates feature
How to define a new Template
How to define a new Merged Document
eSignatures
DocuSign template tags
Mapping eSignature tags
Smart Templates
FAQs
eSignature Envelopes
Questions to Ask
Locating the eSignature Feature
What are eSignature Envelopes?
eSignature Checklist: The Prerequisites to create a new Envelope
How to set up Advanced eSignature Envelopes Step-by-Step
How to add an eSignature Envelope to a form
eSignature Automation Trigger
Viewing Completed eSignature Envelopes
Resending eSignature Notifications
Canceling eSignatures
FAQs
Forms
Questions to ask yourself
Locating the Forms feature
How to create and edit Forms
Adding data fields
Configuring Forms
VersaForms
Sensitive Data Fields
FAQs
Formulas and Calculated Fields
Questions to ask yourself
Locating the Formulas feature
How to work with Formulas and Calculated Fields
Formula Data Dictionary
Dynamic Formula References
Rules of Formula References
Advanced Visibility Rules
Video Guides: Formulas
FAQs
Front Page
Questions to ask yourself
Locating the Front Page feature
How to edit the Front Page
FAQs
Incentive Design
Questions to ask yourself
Locating the Incentive Design feature
How to create and edit Incentive Designs
Incentive Options for One-Time Incentive Type
Incentive Design Options
FAQs
Milestones
Questions to ask yourself
Locating the Milestones feature
How to define a Milestone
FAQs
Project List Columns
Questions to ask yourself
Locating the Project List Columns feature
How to use Project List Columns
FAQs
Project Summary
Questions to ask yourself
Locating the Project Summary feature
How to edit the Project Summary
FAQs
Project Views
Questions to ask yourself
Locating the Project Views feature
How to edit Project Views
FAQs
Roles
Questions to ask yourself
Locating the Roles feature
How to create and edit a Role
Access Groups
Access Groups and Automations
Access Groups and Data Imports
Access Groups and Reports
FAQs
Workflow
Questions to ask yourself
Locating the Workflow feature
How to create and edit the Workflow
Transitions
Workflow Example Overview
FAQs
Administration
Business Days
Questions to ask yourself
Locating the Business Days feature
Setting up Business Days
FAQs
Dashboards
Questions to ask yourself
Locating the Dashboards feature
How to create widgets in your Dashboard
Other Dashboard Actions
Data Import
Questions to ask yourself
Locating the Data Import feature
Steps to Complete a Data Import
Data Import Configurations
Column Header Types
Automatic Data Imports via SFTP
FAQs
Duplicate Check
Questions to ask yourself
Locating the Duplicate Check feature
How to use Duplicate Checks
FAQs
Import Projects
Questions to ask yourself
Locating the Import Projects feature
How to Import From V2
FAQs
Operation Status
Questions to ask yourself
Locating the Operation Status feature
How to use the Operation Status feature
FAQs
Program Info
Project Inquiry
Locating the Project Inquiry feature
How to edit the Project Inquiry Settings
Automating Communications for Project Inquires
Inquiry Summary
Questions to ask yourself
Locating the Program Info feature
How to edit the Program Info menu
Notification Banners
Usage Info
FAQs
Program Statistics
Questions to ask yourself
Locating the Program Statistics feature
How to use Program Statistics
FAQs
Reports
Questions to ask yourself
Locating the Reports feature
How to setup Reports
Multi-instance reports
Sharing Reports
Integrate scheduled Reports
Cross-Program Reports
FAQs
Test Environment
Questions to ask yourself
Locating the Test Environment feature
How to setup a Test Environment
FAQs
User Administration
Questions to ask yourself
Locating the User Administration feature
How to work with User Administration
FAQs
Tools Menu
My Account
Questions to Ask
Locating the My Account feature
How to use the My Account feature
Setting up Multi-Factor Authentication
Missing, lost, or stolen mobile devices: resetting Multi-Factor Authentication
Disabling Multi-Factor Authentication
Recovery Guidelines for MFA Administrators
FAQs
FormSense
Questions to Ask
Locating the FormSense feature
How to use the FormSense feature
FAQs
Grant Access
Questions to Ask
Project Grants vs Broad Grants (i.e. "Grant Access")
Locating the Project Grant feature
Locating the Grant Access feature
How to use the Grant Access feature
FAQs
Integration Guides
ePayments
Questions to ask yourself
Locating the ePayments History feature
How to add ePayments
FAQ
PowerClerk API
Questions to Ask
What is the PowerClerk API?
What can the PowerClerk API do?
Integrating with the PowerClerk API
API Documentation for Developers
Single Sign On (SSO)
Questions to Ask
PowerClerk SSO Configuration
Azure AD Configuration (SAML)
Azure AD Configuration (OIDC)
Okta IDP Configuration (SAML)
SP Configuration
SSO for multiple programs
IDP Configuration Troubleshooting
FAQs
Integration Guide 001: How to configure a Web Adapter – ArcGIS Implementation
Integration Guide 002: How to configure Electric Power Research Institute’s (EPRI) DRIVE Connect software with PowerClerk
PowerClerk Video Guides
New User Video Guide
Setting up Business Days
Dashboards
FormSense
Edit Forms - Tutorial #1
Build A Formula
Edit Forms - Tutorial #2
Automation with Formulas in Action Rules
Configuring Forms
Formulas and Advanced Visibility Rules
Calculated Fields
Milestones
Project Summary
Setting up Roll-up Reports
Roles and User Administration
Visualize Workflows
ArcGIS
API
SFTP Automatic Data Import
Standard Web Adapter Setup
PowerClerk Program Launch
PowerClerk User Group Sessions (UGS)
Learning Management System (LMS)
Join us for Reflow!

Forms

Build Data Fields in Forms and collect the information you need to launch your program and empower your organization with critical data needed for business analytics, planning and operations.

Forms feature


Questions to ask yourself about Forms:

Which information is required, which is optional?
Do any data fields need input restriction?
What information needs to be collected in each Workflow step?
Should any part of the Form be conditionally visible?

Locating the Forms feature

Anyone in a Role with the Edit Forms privilege can navigate to the Form Editor by opening the PROGRAM DESIGN menu and clicking on Forms.


Locating the Forms feature

Figure 1: PROGRAM DESIGN >> Forms


What are Forms?

Forms in PowerClerk are configurable by administrators, and can include logic that makes them dynamic and responsive based on user input. Data required in an application are entered into the application form by the applicant and are visible to the administrator upon submission. The application form is composed of fields, each uniquely labeled and positioned by the administrator or their designee. Many application processes have one application form; however, application processes with multiple application forms are also supported in PowerClerk, maximizing the flexibility to serve organizational needs to run programs.

Administrators define the fields contained in an online form, and the position of fields on the form via drag-and-drop. The Administrator drags each field from the list of options on the right side of the page, and drops the field onto the form.


How to create and edit Forms

To create a new Form, click the “New Form” button on the Forms screen:


Create new Form

Figure 2: Create new Form


At the top of the Form editor, name your new Form in the Form Name field as “Example Application”. PowerClerk will reference your new Form by this name. If the Form configuration is set to “Use for New Project button” the New Project button text will be, “New [Form Name]”. Next to it is the Title field, which is optional and provides a title header for your new Form and is visible to those who fill out this Form. Enter “Demo Form” as your title. Lastly, there is an optional Subtitle field where you can type static text that will appear below the title header.


Form name and title

Figure 3: Form name and title


Please Note: If no Title is filled in, Applicants who complete the form will see the Form Name as the Title of the Form.


Adding Data Fields to the Form

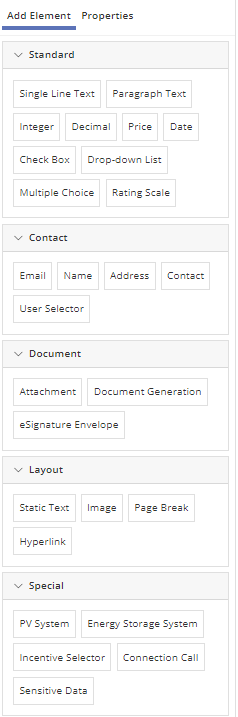
Add Data Fields to the Form by clicking and dragging any Field Type item from the right-hand side menu tab Add Element and drop the element onto your Form:


Add Data Field

Figure 4: Add Data Field


How does a program designer decide what fields should be added to this application Form? The best way to start configuring an application in your program is to take an existing paper or fillable PDF application and translate it into PowerClerk using the list of Data Field types available in the Add Element section.

After you have set up this direct translation of a current Form, you can iterate on the Form in PowerClerk to make the application more efficient. PowerClerk Data Field properties such as making a field Required and setting up Conditional Visibility can be leveraged to make this new online Form much more powerful than what was used previously.

For example, one PowerClerk customer was able to combine eight different interconnection applications into one Form in PowerClerk. What once took eight different documents to administrate can now be collected in one Form, in one Workflow, in PowerClerk.
 
Field types (like “Single Line Text” as shown in Figure 4) have importance to the kind of data that you’re looking to collect from your applicant.  Data Fields that require further calculations in the Formulas editor, for instance, will likely be set as “Integer” or “Decimal” fields.  PowerClerk will recognize the entries into these fields as data types that can be used in calculations.  In certain cases where you want the applicant to enter text (as in “Single Line Text”), you may also want to consider using Drop-down Lists or Multiple Choice field types so that you can present the applicant with a set number of options and avoid variations in data entry (like “Residential Service” versus “Residential” versus “Resi Service”). More information on field types that can be used on Forms can be found under the Form Field Elements section below.
 

Configuring Basic Data Field Properties

All Data Fields on Forms in PowerClerk have a small list of settings in common. You can configure these settings by clicking on that Data Field in the Form Editor and using the Field Properties menu.


Common settings

Figure 5: Common settings


(1) Data Field Source–this has two options. The first is Create New which creates a new data field. The second is Use Existing, which will replace the New data field name line with a drop-down, Choose data field, where you may use a data field that was previously created.

(2) New data field name –this is the database’s name for this Data Field. Note that the Label (what the applicant sees) and the Field Name (the name the database uses to store the data) can be different. Once a Data Field Name has been created and the Form is saved, it cannot be renamed from the Form. To rename, go to Program Design >>> Data Fields, find the data field you wish to rename, and change it. Those saved changes will be reflected in the Form automatically.

(3) Label –text that is displayed above the Data Field when a user is filling out the Form.

(4) Required Field Checkbox –will prevent a Form from being submitted if this field is not filled out.

(5) Help Text –will display your specified text in a blue “?” bubble near the Label of the Data Field:

After you are done adding fields to the Form, click Publish at the bottom of the Form Editor to save any changes.
 

Searching for Form Elements within the Form Editor

By pressing “CTRL-F”, a search bar for form elements will be revealed. This will suppress the built-in browser search on the form editor page, in favor of a more comprehensive search experience. Please note that the browser search is still available by pressing “F3” on Chrome, Edge, or Firefox. PowerClerk’s search function will find results on the Form editor page as you type.


Ctrlf on the Form Editor

Figure 6: Ctrl-f on the Form Editor


(1) As you type, the number of potential results will appear. 

(2) These buttons will help you move to the next match and previous results.

(3) This button will close the search bar.
 

This search functionality will find a match on the following components:

  • Data Field, Group, or Attachment name.
  • Element properties, including:
    • Label
    • Static Text/html
    • Caption
    • Help Text
  • Element Type

Saving a Form as a Draft

Every saved Form will start off as a published version. If you have a published Form, and you are updating it and want to save your work in progress before re-publishing it, you can save it as a draft. Draft Forms can be helpful for managing smaller program design changes; you can avoid creating a Test Environment to author and preview Form changes.
 

Publish Form

Figure 7: Publish Form

 
When you save a Form as a draft you will still be able to see the published version of the Form by going to the Form List Page, clicking on the Form you made a draft of, and then clicking the View Published Form button.
 

View Published Form

Figure 8: How to View Published Form

 
If the Published Form is publicly available and you create a draft version, the active Form will remain as the last published version. If you decide to discard the Form draft, no changes will be made to the published Form. If you decide to Publish the draft, and want your completed Forms to be updated, you will then need to contact support@powerclerk.com and say which form you would like to be promoted by a CPR Admin.
 
Please Note: Production and Test Environments manage their own Draft Forms, there’s no syncing of Draft Forms between these environments. Because Draft Forms are based on published forms, there are some interactions between Test Environment commits and Draft Forms that you should be aware of, see Figure below:
 

Test Environment Form Interactions

Figure 9: Test Environment Interactions with Forms and Drafts

 
(1) When creating a Test Environment, only the Published Form is copied to the Test Environment. Draft Forms are not copied.
(2) When Committing a Test Environment, if a Form was updated and Published in the Test Environment, then it replaces the Production program’s Published Form and the Production Draft Form(if one exists) is deleted. If a Form was not updated and published in the Test Environment, then during the Test Environment commit the Production From (Published and Draft) remain unchanged.
 

Configuring the Form

Back on the Forms List Screen, please expand the new Form by clicking the “ > ” sign, and clicking the Form panel itself, then click the Configure Form button:


Configure Form

Figure 10: Configure Form


The Configure Form screen in Figure 11 has several useful settings that will control which Roles can access the Form in which statuses, how this Form can trigger status changes, and how it can be integrated into administrative process:


Configuring the Form

Figure 11: Configure Form


(1) Selecting the Use for New Project Button checkbox for this Form will allow users to use this Form to enter the Workflow (and create a new, unique record). You may edit the new project button text or leave it as the default: “New” + Form Name. Note that multiple Forms can be configured to create a new project, allowing for programs with multiple, parallel Workflow paths. Every project in PowerClerk can have multiple Forms submitted throughout the Workflow, but only one of those Forms can be used to create the project in the first place.

(2) VersaForms allow administrators to use PowerClerk from any website, without needing a PowerClerk account.

(3) You can create a custom confirmation message. You may use data field tags in your message to pull in reference values (like {data: User First} if you want to leave more personalized messages. Otherwise, the default message will appear when a user submits a Form.

(4) The “In specific statuses” configuration option allows to define the statuses in which this Form is available, and which roles have access to the Form in those specific statuses. For example, when the project enters the Application Changes Needed Status, we could make this Form available to the Applicant so that they can come back to their application and make the appropriate edits. If we did not configure this Form to be available to the applicant in that Status, they would have read-only access to their application, and wouldn’t be able to make any changes to data that had already been submitted. Any Form submitted by a user assigned to a Role that does not have at least one Admin privilege, will always be visible in the view panel of the Project Landing Page (see below) after that Form has been submitted.
 

View panel of the Project Landing Page

Figure 12: View panel of the Project Landing Page


PLEASE NOTE: it is considered a best practice to give Administrators and Program Designers access to any Form in any status that an applicant role has been given access. This follows the general theme that Administrators and Program Designers have global access to data in the program.
 

Summary View

The Summary view provides Roles with Edit Form privilege with a condensed view of their Form for easier navigation and search. These users can toggle between the Summary view of all form elements and the default view. Similar to the default view, Form elements can be selected and edited in the Summary view. In the Summary view, you can click on an element to expand that element’s content:


Summary View

Figure 13: Form Summary View


(1) Toggle Summary View –when enabled will compress all form elements and expand the selected form element.
(2) Data Field Label –each form element’s data field label is always visible in the summary view.
(3) Required Icon –this will appear if it is enabled for the form element in the properties panel on the right.
(4) Help Text Icon –this will appear if it is enabled for the form element in the property panel on the right.
(5) Conditional Symbol –this appears if conditional visibility has been enabled for the form element.
(6) Data Field Type –this will appear on every element on the Form, to notify you which data field type it is.


Form Field Elements

PowerClerk’s From editor allows you to create rich forms using a variety of Form Field Elements to capture the information and data relevant to your Workflow processes.
 

Field Types

The Elements are organized in their own data field groupings to make finding data fields types easier. These groupings are Standard, Contact, Document, Layout, and Special.
 
The following list describes the field types which can be included in a form. It is important to note that additional field types can be developed to accommodate additional technologies, and not all field types will be applicable to all program types.


Field Types
  1. Single Line Text: Free-form text entry field useful for a range of data entry requirements such as account number, etc.
  2. Static Text: Text embedded into the form such as general information, instructions, or other notes. Supports some HTML formatting, including the following tags:
    • “a”
    • “u”, “b”, “I”, “em”, “strong”, “big”, “small”, “pre”, “sub”, “sup”, “s”, “font”
    • “h1”, “h2”, “h3”, “h4”, “h5”, “h6”
    • “address”
    • “table”, “thead”, “tfoot”, “tbody”, “tr”, “td”, “th”
    • “caption”
    • “span”
    • “div”
    • “blockquote”
    • “br”, “ul”, “li”, “ol”, “p”
    • “hr”
    • “#text”
    • Please note: The following attributes are allowed with strict limitations to acceptable values for each:
      • “href” = URL
      • “border “= distance (a number suffixed with a unit from {“%”, “cm”, “ex”, “in”, “mm”, “pc”, “pt”, “px”})
      • “width” = distance
      • “height” = distance
      • “cellspacing” = distance
      • “cellpadding” = distance
      • “target” = “_blank” or “”
      • “name”
      • “colspan”, “rowspan”
      • “start”
      • “style” = semicolon-separated style values for any of the following:
        • “display”: “inline”, “block”
        • “padding”: “inherit”, “initial”, four distances separated by spaces (i.e. “0 1 2 3”)
        • “padding-left”: “inherit”, “initial”, distance
        • “padding-right”: “inherit”, “initial”, distance
        • “padding-top”: “inherit”, “initial”, distance
        • “padding-bottom”: “inherit”, “initial”, distance
        • “margin”: “auto”, “inherit”, “initial”, four distances separated by spaces (i.e. “0 1 2 3”)
        • “margin-left”: “auto”, “inherit”, “initial”, distance
        • “margin-right”: “auto”, “inherit”, “initial”, distance
        • “margin-top”: “auto”, “inherit”, “initial”, distance
        • “margin-bottom”: “auto”, “inherit”, “initial”, distance
        • “width”: “auto”, “inherit”, “initial”, distance
        • “height”: “auto”, “inherit”, “initial”, distance
        • “font-family”: “inherit”, “initial”, one of a long list of fonts that we allow. Many reasonable ones are included.
        • “font-size”: “medium”, “xx-small”, “xsmall”, “small”, “medium”, “large”, “x-large”, “xxlarge”, “smaller”, “larger”, “initial”, “inherit”, distance
        • “font-weight”: “normal”, “bold”, “bolder”, “lighter”, “initial”, “inherit”, distance
        • “color”: either a known color (e.g. “red”, “green”, “blue”, etc.) or a hexadecimal value (e.g. #00FFFF)
        • “background-color”: either a known color (e.g. “red”, “green”, “blue”, etc.) or a hexadecimal value (e.g. #00FFFF)
        • “list-style-type”: “lower-alpha”, “upper-alpha”, “lower-greek”, “lowerroman”, “upper-roman”, “square”, “disc”, “circle”
        • “text-align”: “justify”, “center”, “left”, “right”
        • “text-decoration”: “line-through”, “underline”
  3. Paragraph Text: Same as Single Line Text, but this free-form text field supports multiple lines of text.
  4. Check Box
  5. Integer: Whole numbers only; min and max can be specified.
  6. Decimal: Same as integer but allows decimal expressions. Min and max can be specified.
  7. Drop-Down List: List with entries specified by administrator. Restricts user to configurable set of responses.
  8. Multiple Choice
  9. Name
  10. Date
  11. Address
  12. Price: Similar to Decimal; limited to two decimal places and formatted as USD.
  13. Contact: Combination of: Name, Company, Address, Phone Number, and Email Address in one element.
  14. Email Address
  15. Page Break: Separates the form into multiple pages, each can be given a unique name by the administrator
  16. Rating Scale
  17. Project Table
  18. Document Generation: Generate documents based on project data to simplify communications and contracts.
  19. PV System:
    • A complex control to receive detailed PV system specifications and calculate projected annual performance
    • Linked to CEC PV equipment lists and updated daily
    • Has the notion of multiple inverters and multiple arrays connected to an inverter
    • Contains the following fields:
      • Inverter Manufacturer
      • Inverter Model
      • Panel Manufacturer
      • Panel Model
      • Tracking System – None, Single-Axis, Dual-Axis
      • Tilt – defined per array
      • Azimuth – defined per array
      • Shading
    • Calculates DC rating and CEC-AC rating based on CEC equipment specs and orientation
    • Runs a PV simulation on their system in PowerClerk Interconnect using CPR’s SolarAnywhere® PV simulation technology and TMY3 insolation data
    • Calculates Design Factor (%), which is the ratio of estimated annual production of the system as configured by the user vs. production of the same equipment in the reference orientation and location. Reference zip code and reference tilt are specified by the customer and input by CPR for each program. It is assumed that reference azimuth is 180 degrees (south) and reference shading is none.
    • Show Battery Component: This setting needs to be enabled for the respective PV System data field group on the Data Field Groups tab of the Data Fields page to enable this setting. Please note: This setting cannot be disabled once it has been enabled.
  20. Attachment: For upload of electronic attachments, generation of documents from templates specified by the administrator, as well as configuration of eSignatures. See “Document Generation” and “eSignatures” sections for more detail.
  21. Energy Storage System: The Energy Storage System form element can be used to capture stand-alone energy storage system specifications, or as a separate field in AC-Coupled scenarios where PV + Energy Storage System specifications need to be captured. Please note: Please contact support@powerclerk.com to have this element enabled by a CPR Admin.
  22. Signature Request: One instance of this control is required for routing of eSignatures and placed below Attachment fields.
  23. eSignature Envelope: Creates an instance of an envelope where you can choose an Envelope Definition from Envelopes you have created.
  24. User Selector: Provides a dropdown list containing names of all registered users in roles with Program Admin privileges.
  25. Formula Result: Displays the result of the chosen Calculated Field.
  26. Hyperlink
  27. Table: Add a Table element to allow input of data in a tabular form element. This form element needs to first be setup under Program Design >> Data Fields >> Data Field Groups to become available in the form editor.
  28. Sensitive Data: Can be used to capture sensitive user information, such as Social Security Numbers.
  29. Incentive Selector: Allows selection of eligible incentives configured for the program.
  30. Call Connection (previously Call Web Adapter): Integrate access to custom web services on Forms by offering a button to call a Connection.
  31. Custom List: A Custom List can be any kind of hierarchical list of data, that you would like your applicants to be able to select pre-defined data from. This form element needs to first be setup under Program Design >> Data Fields >> Custom Lists to become available in the form editor.
  32. Image: Allows display of a Content Library image object on a Form.

The Administrator can generate a Preview of the form in its current state in a new browser window during the editing process without needing to commit changes. Changes to a form can be discarded with the Cancel button or committed with the Save button.
 

Field Properties

Most fields can be marked as required and a red asterisk will appear to demonstrate the field is required. Integer and Decimal fields permit the administrator to specify minimum and maximum acceptable values; the field will reject entries outside of the acceptable range.

Conditional Visibility

Most fields can also be configured to be conditionally visible. Conditional visibility enables the administrator to specify the condition under which the field becomes visible/invisible to the applicant, and thus enables the form to adjust its requirements dynamically. Dynamic forms minimize applicant confusion by hiding fields that aren’t pertinent, thus reducing the overall length of the application, and the number of opportunities for an applicant to make a mistake.

In the example in Figure 14 below, the administrator is specifying that the Attachment Label field is only visible when the applicant selects the checkbox in the preceding field: “Are you a new Applicant?”


Conditional Visibility

Figure 14: Conditional Visibility


Please note: If you intend to use a data field on two different forms and make one of the fields conditionally visible, then please review PowerClerk’s Conditional Visibility logic in the following video to better understand how PowerClerk would handle such Conditional Visibility configuration:


Please note: As an exception to the rule explained in the preceding video, Attachment field elements are the only form elements that are retained even if the attachment field is temporarily conditionally invisible. The reasoning for retaining uploaded attachments is to avoid uploading the attachment multiple times dependent on the underlying configuration for the field’s conditional visibility.
 

Additionally, the Administrator may specify Help Text and/or a Help Link for nearly every field type. Either will be visible to the applicant when clicking the blue help icon visible on a data field. See Figure 15 – Help Text and Help Link below.


Help Text

Figure 15: Help Text


Integer- and Decimal form elements

Integer form elements allow you to capture whole numbers in comparison to Decimal form elements with a decimal point in it, like these: 1.5, 0.6, or 3.14. You can set a Default Value for these fields and also define the allowed number value range with the lower (Min Value) an upper (Max Value) value limit.
 
Field properties:

  • Label: A classifying phrase or name displayed above the integer form element
  • Default Value: The initial value of this form element, set by PowerClerk without user input.
  • Min Value: The lower value limit for this form element.
  • Max Value: The upper value limit for this form element.
  • Required Field: Enforces a value for this field. If none is set the form cannot be submitted.
  • Read Only: The value of this form element cannot be edited in the context of the current form.
  • Help Text: Guiding information on how to process or fill out this form element.
  • Help Link: Additional information retrievable from an external web source.
  • Conditional Visibility: This element will only be visible on the Form, if the condition for its visibility is met.
  • Field Name: The internal data field name, corresponding to the list of data fields presented under Program Design >> Data Fields.


As shown in Figure 16 the thousands comma separator for Integer- and Decimal form elements provides an option in the Form Editor and in Data Fields to enforce comma separators for large numbers to ease the display of numerical digits:


Thousands separator for Integer- and Decimal form elements

Figure 16: Thousands separator for Integer- and Decimal form elements


You also have the option to set the thousands separator for Integer- or Decimal form elements under Data Fields as shown below:


Thousands separator for Integer- and Decimal form elements under Data Fields

Figure 17: Thousands separator for Integer- and Decimal form elements under Data Fields


Please note: Editing this setting under the Data Fields functionality will affect all references to that field in any form where the field exists to enforce display with commas. This editing functionality under Data Fields only becomes available after at least one Form draft referencing the respective data field has been saved.
 

Sensitive Data Fields

PowerClerk allows you to add Sensitive Data Fields to capture sensitive user information, such as Social Security Numbers, which you want to protect against unwarranted disclosure. Administrators of your program working with Sensitive Data Fields are required to setup Multi-Factor Authentication (MFA) for their account access in PowerClerk. To setup your administrative PowerClerk account accordingly, please navigate to Settings >> My Account >> Set up Multi-Factor Authentication and visit our Support Center article for further information.

As shown in Figure 18, you can drag a Sensitive Data Field to your Form editor as any other data field:


Adding a Sensitive Data Field

Figure 18: Adding a Sensitive Data Field


When one of your program administrators with the permission to access Sensitive Data Fields navigates to a Form containing this kind of data field, they will be able to click the Show button to disclose the obfuscated information:


Show / Hide Sensitive Data Field

Figure 19: Show / Hide Sensitive Data Field


Handling PII and sensitive information

Personal identifiable information, or PII, is any information that permits the identity of an individual to be directly or indirectly inferred. PII can include contact information, account information, etc. of an individual or entity. Some types of PII are considered sensitive and have additional requirements to manage appropriately. Sensitive PII may include the government identifying numbers, financial accounts, etc. of an individual or entity.
 

Examples of Personal Identifiable Information or PII*
PII Sensitive PII
Name
Address
Phone Number
Email Address
Utility Account Number
Meter Number
Demographic Information
Social Security Number (SSN)
Employer Identification Number (EIN)
Driver’s License or State ID Numbers
Passport Number
Alien Registration Number
Financial Information
Financial Account Numbers
*Note this is not an exhaustive list

 
PowerClerk has three functions designed to appropriately manage sensitive PII: Sensitive Data Field, Sensitive Attachment, and Multi-Factor Authentication (MFA) for users. Identifying attachments and fields as sensitive enforces a higher level of role-permission for administrator user accounts to access the items and implements a higher level of data encryption for the underlying data. Follow each link to learn how to configure your program to include these functions when handling sensitive data.
 

PowerClerk Functions to Handle Sensitive PII
Sensitive Data Field Designates the Data Field as containing sensitive information. Requires an Admin with “View Sensitive Data” privilege and MFA enabled to view.
Sensitive Attachment Designates the Attachment as containing sensitive information. Requires an Admin with “View Sensitive Data” privilege and MFA enabled to view.
Multi-Factor Authentication (MFA) Multi-Factor Authentication makes a user account more secure by requiring a second factor in addition to the password to log into the account. MFA is required to have “View Sensitive Data” privilege for Admins.

 
PowerClerk has been designed to act as the system of record for such information when these functionalities are utilized; however, your organization may have its own security practices and requirements that should be considered.

 
FAQ Regarding Sensitive Data
 
Can Sensitive Data Fields be used to populate Communications or Document Templates?
No, Sensitive Data Fields are not intended to populate Communications or Document Templates, given the sensitivity of the data they are used to collect.
 
Sensitive Attachments should be used when documents containing sensitive PII are uploaded.
 
What if users need to be provided a Document Template to input sensitive information?
To keep the sensitive information protected, use the generate document via Document Template form element for the user to download, wet-add any sensitive information, wet-sign (if applicable), and upload the completed document into PowerClerk as a Sensitive Attachment. By doing so, the sensitive information will be kept on the document only and can be accessed by Admin with MFA and the view sensitive data privilege.
 
What if sensitive information needs to be collected from individuals who lack a PowerClerk account? (i.e., a homeowner whose contractor has submitted an application on their behalf)
Our “Existing Project VersaForm” is specifically for collecting information from an individual without requiring a PowerClerk account. Access to the VersaForm can be shared using a data field tag (hyperlink) embedded within a Communication Template. Sensitive fields and/or attachments can be included on the VersaForm to collect the sensitive information. As an extra precaution, the Existing Project VersaForm link can be configured to become unavailable after the form has been submitted.
 
To learn more about how create a VersaForm for an existing project, please visit this link on our Support Center Article.


Attachment Fields

Attachment fields make it possible to upload project relevant document types such as .docx, .csv, .xlsx and .pdf file types for easy reference by Applicants or Administrators. Optionally you can request to specify additional acceptable file types and relax the existing 5 MB size limit currently applicable to this field type.
 

Once an attachment is created and saved in the Form, you cannot edit the field name directly on the Form. You will have to go to the Program Design >>> Data Fields and rename the attachment there. Once it is renamed and saved in Data Fields, those changes will be reflected on the Form and anywhere else the Attachment was referenced.

Configurable File Extensions: This option allows Program Designers to choose which file types are acceptable for each attachment field (e.g., .JPEG, .PNG, .CAD, etc.). You can define a variety of acceptable file formats with the exclusion of executable files like .exe or .bat:


Configure Allowed Files

Figure 20: Configure Allowed Files


Allow Large Files: The option to allow Large File sizes to be attached can be configured to enable attachments larger than the platform default. Please note: This option should only be used in circumstances explicitly requiring a deviation from the default value.


Allow Large Files

Figure 21: Allow Large Files


VersaForms™

VersaForms allows administrators to use PowerClerk forms on any website—no PowerClerk account registration required. With VersaForms, utilities can simplify enrollment, increase conversion and better manage workflows—all from a single platform.
 

  • Information submitted on a VersaForm is fed directly into PowerClerk workflows without requiring API configuration or other integration.
  • VersaForms are easily adapted to the look/feel of the landing page they are hosted on.
  • Forms can be created and modified in minutes by PowerClerk administrators, and easily embedded into utility-managed websites/landing pages.

Please note: The submission of a VersaForm™ creates a project. These projects count toward your utility’s (or agency’s) total application volume.
 
To enable VersaForms for your PowerClerk program, please file a new request in the Ticket System and choose the following option:
 

Request Embed ID

Figure 22: Request Embed ID

 
Once enabled you will be able to denote any of your Forms as a VersaForm by navigating to Program Design >> Forms >> expand the respective form and click the Configure Form button to enter the VersaForm configuration dialog as shown below:
 

Enable VersaForm option

Figure 23: Enable VersaForm option

 
VersaForms can be used in two distinct ways:

  1. Embed the VersaForm in your own website by copying two lines of code (e.g. for Energy Efficiency Rebate programs).
  2. Link to your VersaForm from a Communication Template send as an E-Mail.


VersaForm code snippet

Figure 24: VersaForm code snippet and direct link


See above samples for the code snippets, and respectively the direct link, which you can use in the context of your VersaForm scenario to embed your forms or direct your users with a link to your VersaForm.


Existing projects and VersaForms

Existing project VersaForm, the counterpart to new project VersaForm, allow for a form to be accessed and updated via an authenticated link, without requiring the user to log-in. Once you have requested an EmbedID for your program via PowerClerk’s Ticket System to enable VersaForms, the configuration option can be found under Program Design >> Forms >> expanding the respective Form and clicking the Configure Form button:
 

Existing projects and VersaForms

Figure 25: Existing projects and VersaForms

 
As shown in above screenshot, the Template Tag for this specific Form {form_link: <Form name>} can be embedded in a Communication Template. The recipient (e.g. a homeowner who interacts with PowerClerk only via their solar installer) is then able to click the authenticated link which allows them to submit this particular VersaForm for the existing project:
 

Communication Template example

Figure 26: Communication Template example

 
Notably, the authenticated link can be defined to expire, and upon expiration, show a customizable expiration message. The availability (or access) may also be mapped to specific statuses in your program’s Workflow. Similarly, the Communication Template may be mapped to certain statuses so that Administrators cannot manually send the message if the link is configured to be unavailable.
 
By using a combination of a new project VersaForms and existing project VersaForm, a user’s email address can be confirmed allowing further information to be obtained from this “qualified” email address.
 
The below screenshot shows an example existing project VersaForm, only accessible through the authenticated link:
 

Authenticated Link VersaForm Example

Figure 27: Authenticated Link VersaForm Example


VersaForms: custom font-size and font-family parameters

Two optional customization parameters allow you to set the font-size and font-family for embedded VersaForms: data-font-size-px and data-font-family. These parameters need to be added to the script tag used to embed a VersaForm:

  • data-font-size-px: the value of this parameter should be a number that represents the font size you wish to use. It should not include the px part.
  • data-font-family: the value of this parameter should be the name of the font family you with to use. It is the responsibility of the hosting page to make sure the actual font files are loaded as well.

Example:
<script type="text/javascript"
     <mark>data-font-size-px="17"</mark>
     <mark>data-font-family="sans-serif"</mark>
     src="<-- VersaForm script link -->" >
</script>


VersaForms: reCAPTCHA option

reCAPTCHA for Versa Forms allows to secure anonymous form submissions. This option can be configured under Program Design >> Forms >> by expanding the respective VersaForm and clicking the Configure Form button >> option “Enable reCAPTCHA” as shown below:
 

 reCAPTCHA option

Figure 28: reCAPTCHA option

 
This will enable the reCAPTCHA protection during submission of a VersaForm to prevent spam submissions of your VersaForm:
 

 reCAPTCHA option

Figure 29: reCAPTCHA option


Video Guides

Edit Forms – Tutorial #1

This video guide will show you how to insert key data fields into forms.  Capture key info from the form so that you have the necessary inputs to approve or reject applications.


Edit Forms – Tutorial #2

This video guide will show you how to adjust settings on key data field elements.  Set features like Conditional Visibility and PV or Custom List elements to capture key technical info.


Configuring Forms

This video guide explains how to Configure Forms in PowerClerk.

 
A full list of all Video Guides can also be found here.

FAQs

Q: I want to create a read only field to store the application fee amount, but prevent edits to this field, how can I do this?
A: The wrong way to go about this is to try and create a read-only field and assign a default value to this field. Such default values unfortunately are not saved upon form submission as read-only fields are intended for the purpose of displaying data that has been previously submitted.
The correct approach to accomplish what you are intending is to create a formula that contains the constant value, then save and enable that formula, and then connect the Formula Result element in your respective form field. This way the value for this field will be properly saved.
Q: Can I add HTML formatting to static text form fields?
A: Yes, within PowerClerk forms you can utilize a broad variety of formatting options to style your static text form elements according to your needs. Please click on this link for a list of available HTML formatting tags that you can add to static text form fields.
Q: How do I go about getting PowerClerk updated to reflect a new inverter that I cannot find in the current list?
A: PowerClerk uses the CEC-approved equipment lists for inverters (external link) and PV modules (external link) as the sources for its equipment option lists. We monitor those websites and when updates are made there, they are generally reflected in PowerClerk within one business day. However, we have no input or visibility into the approval process for any particular equipment items.
So it is up to the manufacturers to have their equipment models approved for inclusion on the CEC lists; instructions for that are available on the CEC website, including: http://www.gosolarcalifornia.ca.gov/equipment/documents/General_Listing_Request_Procedures.pdf.
Sometimes, the equipment item in question is actually in the option list but it is listed in an unexpected way so that it is not immediately found. Most often that’s due to a manufacturer name variation; here, in fact, there are two variations for this manufacturer, Northern Electric and Northern Electric & Power. But the model you inquired about it is not listed under either one.
Cases of unlisted equipment items like this happen quite infrequently, but some of our program admins have set up their form in such a way that an unlisted equipment scenario can be handled using conditional visibility of inputs. If you’d like some suggestions as to how you might do that, let us know.

WORK-AROUND One possible work-around for the issue with users selecting the “closest” model to their inverter is to set up the form with a “Technology Type” input that included Solar PV (Equipment not listed):
Label settings If Solar PV is chosen, then the standard PV System element is displayed, but if the “Solar PV (Equipment not listed)” option is chosen, then an alternative set of inputs could be displayed instead. For example:
List Fields
Q: If you have a set of fields on a form (e.g. Form 1) that are also utilized on other forms (e.g. Form 2), do we need to update the same field value on each form or just update the field on Form 1 in order reflect the same data in the same data field on Form 2?
A: You would only need to update the Data Field on Form 1 to have Form 2 reflect the same change in data. Please note that for this to work, the data field on Form 1 would need to have the same Field Name as the data field on Form 2 as shown below:
Field name configuration
Q: How can I make a field's appearance conditional?
A: Most fields can be configured to be conditionally visible. Conditional visibility enables the administrator to specify the condition under which the field becomes visible/invisible to the applicant, and thus enables the form to adjust its requirements dynamically. Dynamic forms minimize applicant confusion by hiding fields that aren’t pertinent, thus reducing the overall length of the application, and the number of opportunities for an applicant to make a mistake.
In the example below, the administrator is specifying that the Please Describe field is only visible when the applicant selects ‘Other’ in the preceding field: “Generation Type – Prime Mover.” Naturally, if the generation type was defined in a different entry in the drop-down list, the applicant wouldn’t need to specify the generation type in a text field.
Conditional Visibility Settings:
Conditional Visibility Settings

Have additional questions? Contact us to nominate your FAQ and help others find answers to your own questions concerning this feature.

Create A Support Ticket

Not finding your answer here?  Submit a question to our support team at the PowerClerk Ticket System and leverage the PowerClerk team’s expertise.