PowerClerk Support Center
- Program Design
-
- Automations
- Channels
- Communications
- Connections
- Content Library
- Custom API IDs
- Data Fields
- Deadlines
-
- Questions to ask yourself
- Locating the Deadlines feature
- What are Deadlines
- How to Create a Deadline
- Deadline Automation Action Rules
- Utilizing Project Admin Page for Deadlines
- Communication Templates for Deadlines
- Deadline Set/Satisfy Options
- Program-Wide Deadline Actions
- Reporting on Deadlines
- Deadlines in Project List Columns
- FAQs
- Document Templates
- eSignature Envelopes
-
- Questions to Ask
- Locating the eSignature Feature
- What are eSignature Envelopes?
- eSignature Checklist: The Prerequisites to create a new Envelope
- How to set up Advanced eSignature Envelopes Step-by-Step
- How to add an eSignature Envelope to a form
- eSignature Automation Trigger
- Viewing Completed eSignature Envelopes
- Resending eSignature Notifications
- Canceling eSignatures
- FAQs
- Forms
- Formulas and Calculated Fields
- Front Page
- Incentive Design
- Milestones
- Project List Columns
- Project Summary
- Project Views
- Roles
- Workflow
- Administration
- Tools Menu
- Integration Guides & API
- PowerClerk Video Guides
-
- New User Video Guide
- Setting up Business Days
- Dashboards
- FormSense
- Edit Forms - Tutorial #1
- Calculated Fields
- Build A Formula
- Milestones
- Edit Forms - Tutorial #2
- Project Summary
- Automation with Formulas in Action Rules
- Setting up Roll-up Reports
- Configuring Forms
- Roles and User Administration
- Formulas and Advanced Visibility Rules
- Visualize Workflows
- ArcGIS
- API
- SFTP Automatic Data Import
- Standard Web Adapter Setup
- PowerClerk Program Launch
- PowerClerk User Group Sessions (UGS)
- Learning Management System (LMS)
- Join us for Reflow!
- NEW: PowerClerk Certifications
Workflow
Visualize Workflows to masterfully design program flow and control project statuses.
Questions to ask yourself about the Workflow:
What are the steps in my application process?
Do we have an existing workflow diagram (in Visio, for instance)?
Who has control of the application in each status?
When should control be handed off?
Which statuses should be reachable from which other statuses?
Locating the Workflow feature
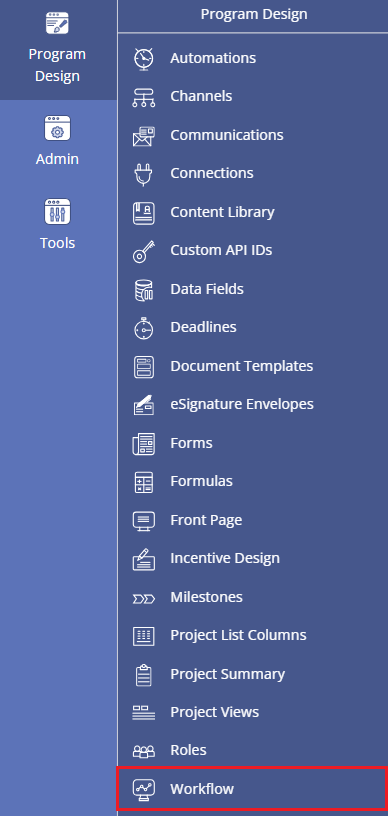
Anyone in a Role with the Edit Workflow privilege can navigate to the Workflow by opening the PROGRAM DESIGN menu and clicking on the Workflow button.
How to create and edit the Workflow
The Workflow is the backbone of operations – the process defined in this tool will support many other aspects of the Program, including user behavior, Form Configuration, Automations, Communications, Deadlines, and more.
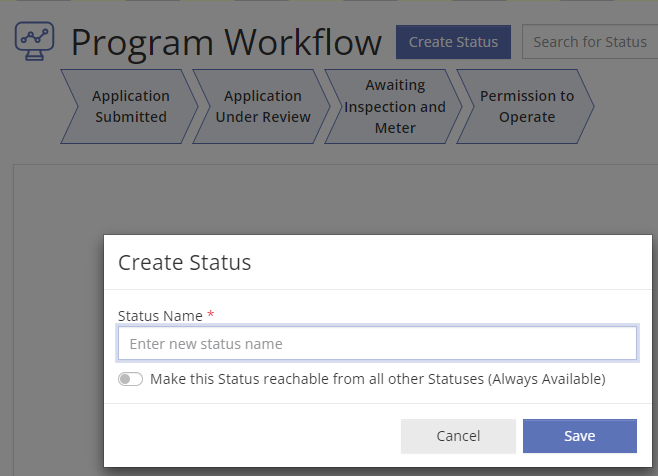
To create a new status within the Workflow scratchpad, click the Create New Status button in the upper left section of the Workflow screen. You will be asked to name your new status as shown below:
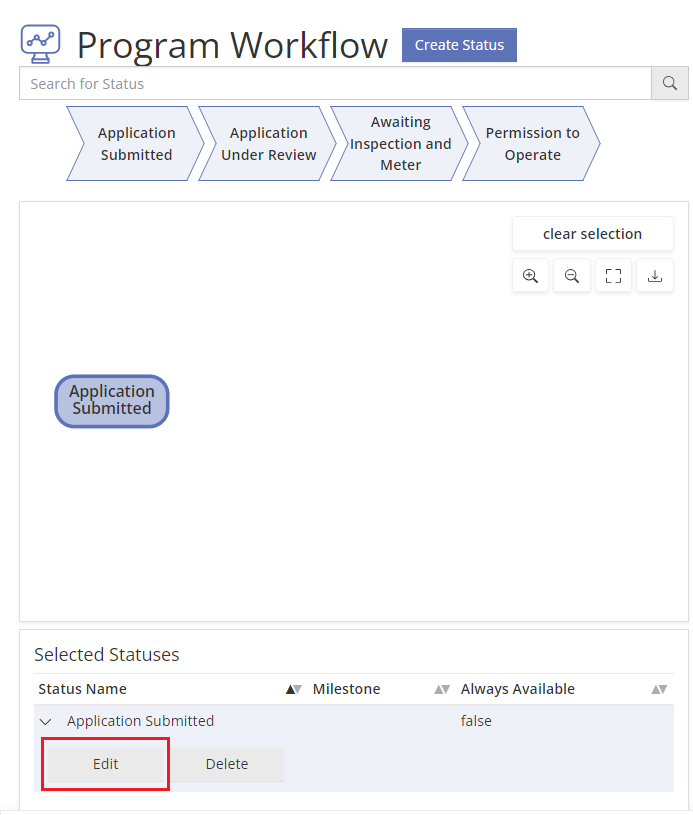
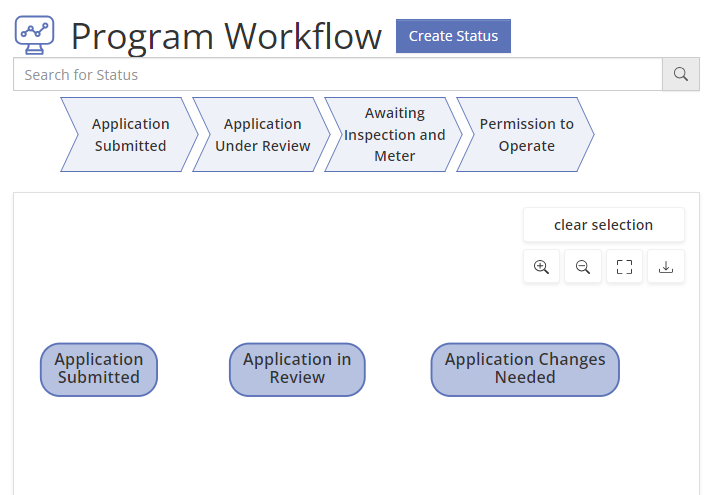
At any point, you can click on a Status and choose to rename it by clicking ‘Edit’.
Transitions
Status transitions are important because they dictate where PowerClerk can move projects via Automations and Deadlines.
Status transitions are easily configured by dragging and dropping. To create a new Status transition, double click the area within a Status rectangle, a green dotted border will appear. Then, left-click and hold while dragging to any other Status. When the second Status’s rectangle turns green, you can release your left mouse button, and a new Status Transition will appear. Note that orange Always Available statuses can be entered from any other status, therefore transition lines to them are unnecessary and therefore prevented.

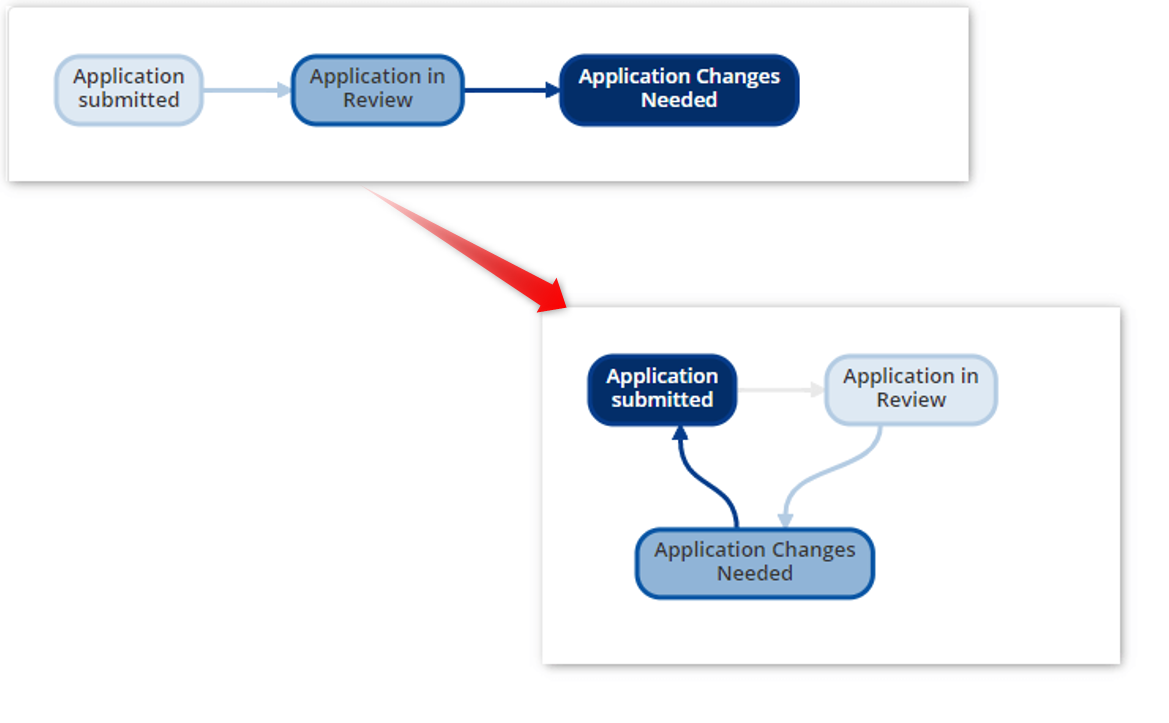
Statuses can be rearranged by clicking and dragging, and the view can be zoomed in and zoomed out using the buttons in the top-right of the screen or using the mouse scroll wheel. Combining these two actions can help make the Workflow more visually appealing.
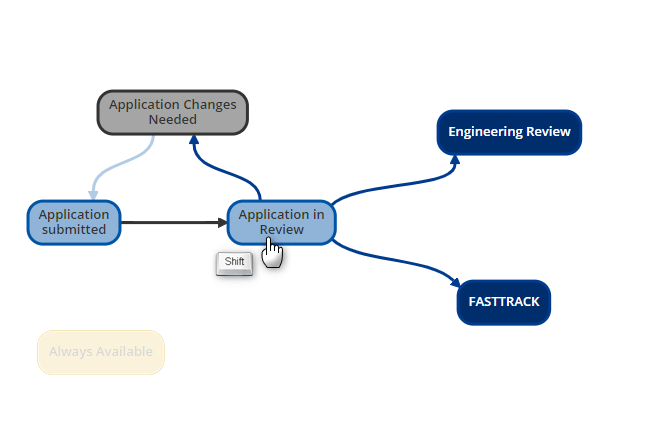
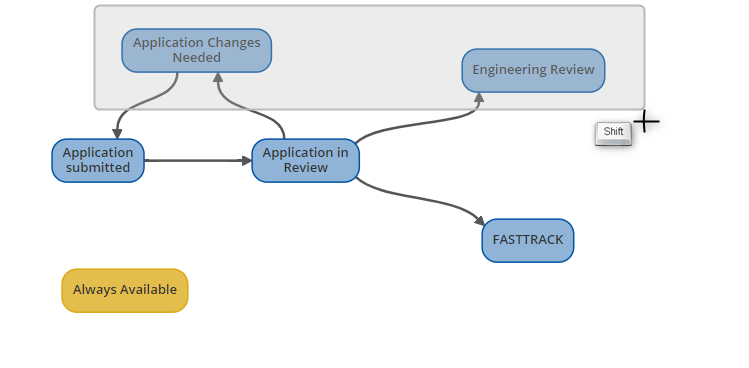
To select and move a specific set of statuses (not necessarily close in proximity) hold the shift key and click the statuses one at a time. To move a collective group of statuses (within the same proximity) hold the shift key and define the area for selection.
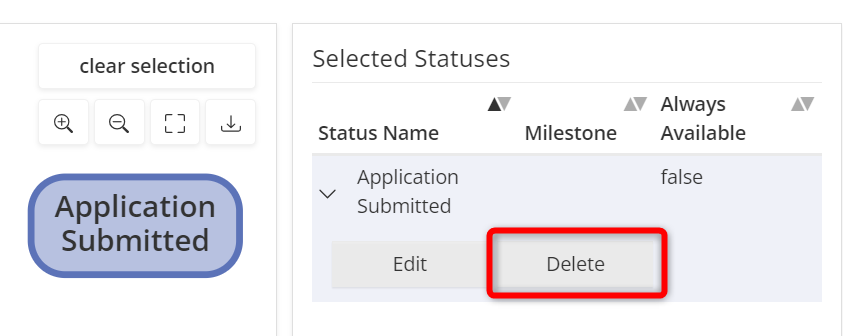
To delete a Status or Status transition, click the Status Name then click the Delete button. After you are done making changes, click the save button to commit the updated Workflow to the program.
The Statuses that comprise the Workflow will be externally visible to users with View-access to a Project, so Status naming should intuitively imply what action is required. PowerClerk automatically saves a date-time stamp each time a project enters a Status, making it straightforward for the administrator to report on time spent in each Status or Workflow segment.
Workflow Example Overview
See below a complex example of a Workflow that can build within PowerClerk to reflect the requirements of your utility program:
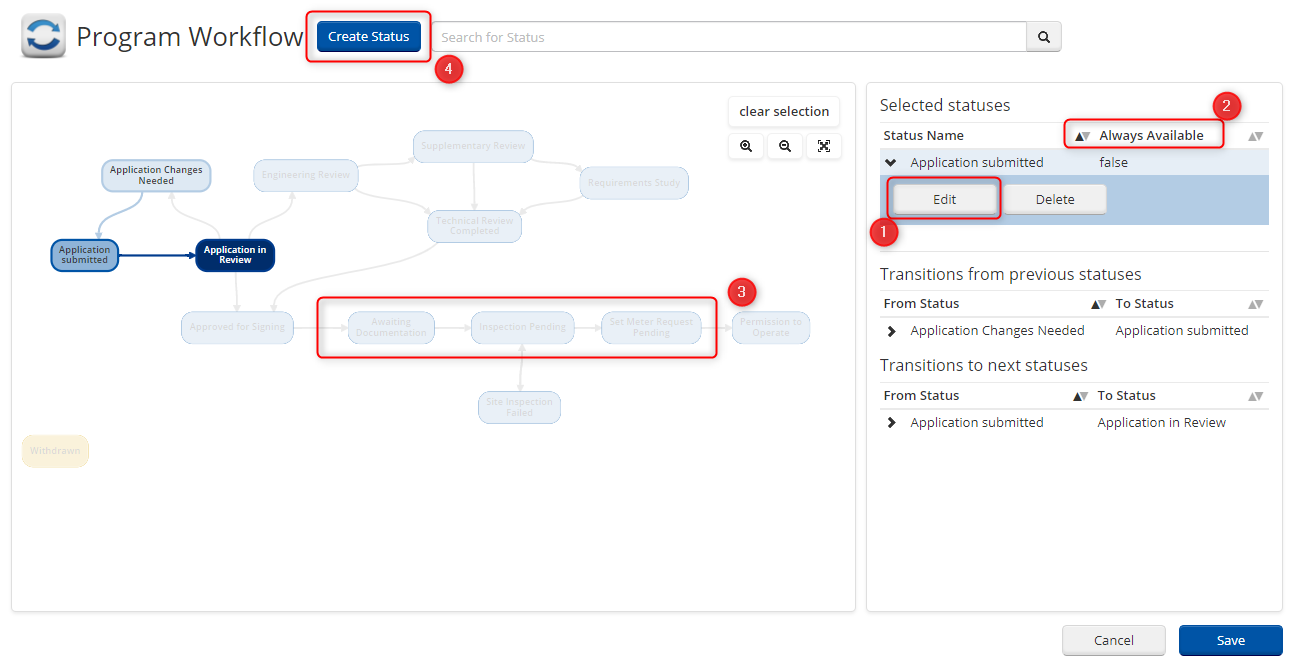
The above Workflow is composed of statuses and status transitions. Each status is represented by a rectangle. The text inside the rectangle is the status name, which can be changed at any time by selecting the status and clicking the Edit button (1).
The status’s color can represent one of two things (2): if the status is blue, the status is considered conditionally available, and any project that needs to enter that status must follow the available paths in the Workflow to get there. If the status is orange, that status is always available, which means any project can enter this green status from any other status, even if there is no status transition between the two.
The lines with arrows between statuses represent status transitions. These form the rules of the Workflow, which will be translated into PowerClerk’s code anytime the Workflow is saved. As can be seen in the screenshot above (3), if there is no transition between the Awaiting Documentation and Set Meter Request Pending, an application reviewer cannot skip over the Inspection Pending status – they must follow the allowable paths represented by status transitions. To create a new status, use the Create New Status button (4) and type a new status name. Note that each status must have a unique name.
Video Guides
Would a video guide help to better explain Workflows? Contact us and let us know.
A full list of all Video Guides can also be found here.
FAQs

If you click Edit Design for an editable existing incentive or create a new Incentive Design, you will see that the Incentive Length field is editable and can have any value from 1 to 30 years.
In this same dialog you can also set other fields, such as Annual System Degradation. As the note on the page explains, that is a value indicating the percent by which the system production calculation should be reduced each year in calculating the estimated incentive amount. The default for this input is 0.0% -- no reduction. Note that it is a measure of the amount of reduction each year; so a value such as 0.5% would be typical.
Outside of that, the production server is just like the sandbox – nothing is set in stone, or needs to be final-final before going to the production server, you can make changes before and after you open it to the public.
- If an application isn’t yet submitted and you’ve added fields, those pop up towards the person filling out the form out of the blue, potentially on pages that were considered completed and now are not
- Applications that have been submitted and got new required fields added now make an admin go “how did this get submitted without the field being filled out? It’s required after all!”
- Applications that have been submitted and are being viewed by the user that filled it out now have fields, conceivably with values that an admin filled in later, that the user never submitted.
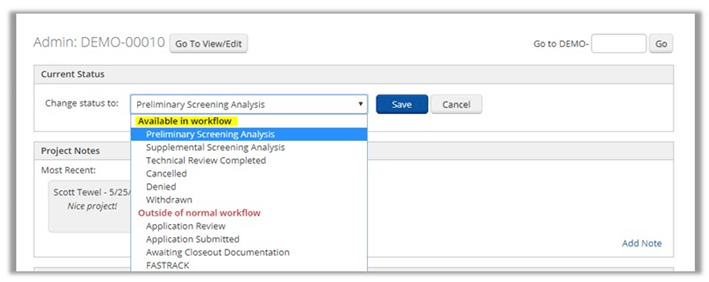
Formulas and Automations may also be utilized so this occurs automatically. For example: If Applicant A, should be placed in Status B because their system size is greater than 5 kW you would create a formula (system size is > 5 kW) which would then be combined with an Automation triggered by the submission of a form and an Action Rule that puts the project in Status B when the formula is true.
Have additional questions? Contact us to nominate your FAQ and help others find answers to your own questions concerning this feature.
Create A Support Ticket
Not finding your answer here? Submit a question to our support team at the PowerClerk Ticket System and leverage the PowerClerk team’s expertise.