PowerClerk Support Center
- Program Design
-
- Automations
- Channels
- Communications
- Connections
- Content Library
- Custom API IDs
- Data Fields
- Deadlines
-
- Questions to ask yourself
- Locating the Deadlines feature
- What are Deadlines
- How to Create a Deadline
- Deadline Automation Action Rules
- Utilizing Project Admin Page for Deadlines
- Communication Templates for Deadlines
- Deadline Set/Satisfy Options
- Program-Wide Deadline Actions
- Reporting on Deadlines
- Deadlines in Project List Columns
- FAQs
- Document Templates
- eSignature Envelopes
-
- Questions to Ask
- Locating the eSignature Feature
- What are eSignature Envelopes?
- eSignature Checklist: The Prerequisites to create a new Envelope
- How to set up Advanced eSignature Envelopes Step-by-Step
- How to add an eSignature Envelope to a form
- eSignature Automation Trigger
- Viewing Completed eSignature Envelopes
- Resending eSignature Notifications
- Canceling eSignatures
- FAQs
- Forms
- Formulas and Calculated Fields
- Front Page
- Incentive Design
- Milestones
- Project List Columns
- Project Summary
- Project Views
- Roles
- Workflow
- Administration
- Tools Menu
- Integration Guides & API
- PowerClerk Video Guides
-
- New User Video Guide
- Setting up Business Days
- Dashboards
- FormSense
- Edit Forms - Tutorial #1
- Calculated Fields
- Build A Formula
- Milestones
- Edit Forms - Tutorial #2
- Project Summary
- Automation with Formulas in Action Rules
- Setting up Roll-up Reports
- Configuring Forms
- Roles and User Administration
- Formulas and Advanced Visibility Rules
- Visualize Workflows
- ArcGIS
- API
- SFTP Automatic Data Import
- Standard Web Adapter Setup
- PowerClerk Program Launch
- PowerClerk User Group Sessions (UGS)
- Learning Management System (LMS)
- Join us for Reflow!
- NEW: PowerClerk Certifications
Import Projects
Locating the Import Projects feature
Anyone in a Role with Use V2 Import privilege (which needs to be assigned by a CPR Admin) can access this feature by opening the ADMIN menu and clicking on Import Projects:
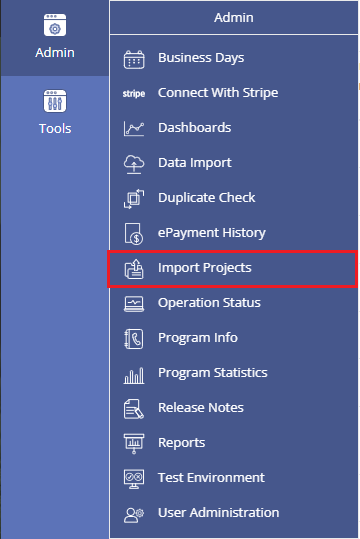
How to Import Projects
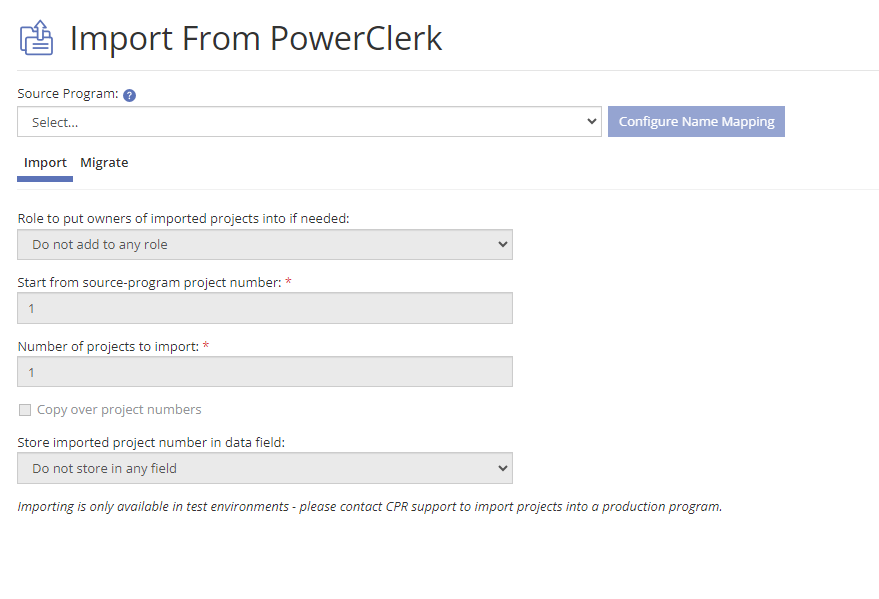
With PowerClerk’s Import Projects feature you can retain and migrate program data from your other programs or import complete projects to preserve their present status.
Import vs. Migrate
The Import tab allows you to retain all the Forms and the current status of all projects in the source program to be transferred over as they are:
If your goal is to transfer only the actual data of the project in the source program (i.e., create fresh, unsubmitted projects) then you would use the migrate option as shown below in Figure 4:
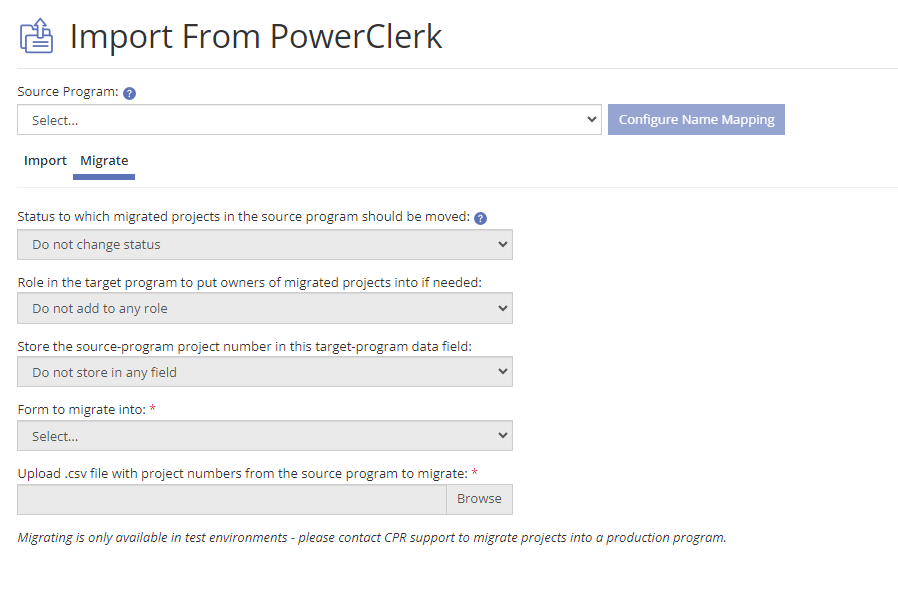
When you have completed the configuration mappings and marked other options to your preference, please select the Import or Migrate button to validate your import or migration. You will be notified of any mismatches or errors, and PowerClerk will possibly cancel your import or migration if any critical failures are generated.
Clicking on the Configure Name Mapping button presents you with a dialog that allows you to map Data Fields from the source program to their respective counterpart in the destination program. You can also ask PowerClerk to automatically map matching Data Fields with the Match by Name button:
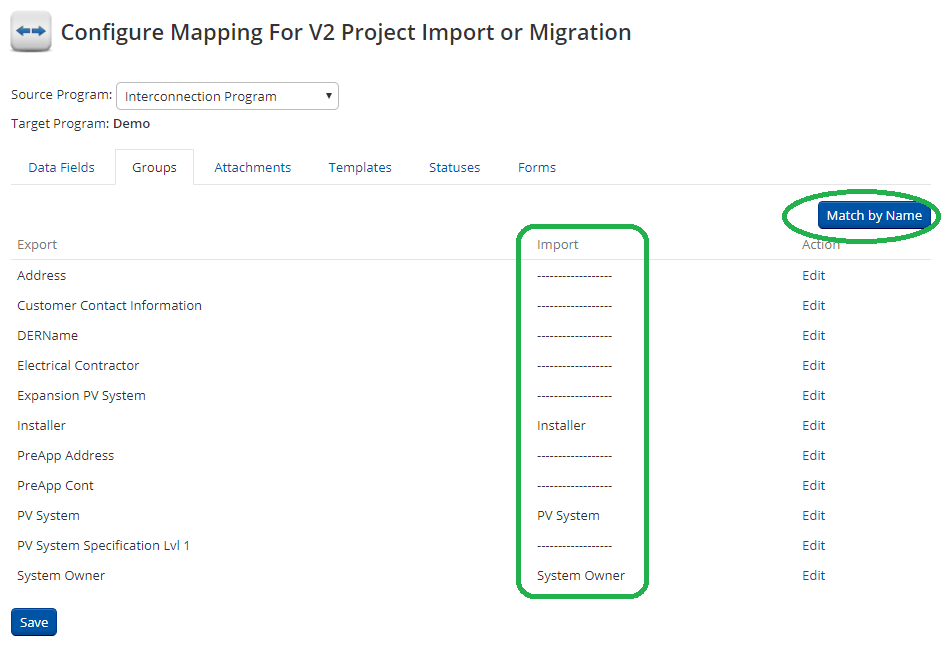
Once you are satisfied that your import or migration is validating successfully without any errors, please contact Support@PowerClerk.com so we can commit your import or migration.
FAQs
Have additional questions? Contact us to nominate your FAQ and help others find answers to your own questions concerning this feature.
Create A Support Ticket
Not finding your answer here? Submit a question to our support team at the PowerClerk Ticket System and leverage the PowerClerk team’s expertise.
