PowerClerk Support Center
- Project Pages
- Program Design
-
- Automations
- Channels
- Communications
- Connections
- Content Library
- Custom API IDs
- Data Fields
- Deadlines
-
- Questions to ask yourself
- Locating the Deadlines feature
- What are Deadlines
- How to Create a Deadline
- Deadline Automation Action Rules
- Utilizing Project Admin Page for Deadlines
- Communication Templates for Deadlines
- Deadline Set/Satisfy Options
- Program-Wide Deadline Actions
- Reporting on Deadlines
- Deadlines in Project List Columns
- FAQs
- Document Templates
- eSignature Envelopes
-
- Questions to Ask
- Locating the eSignature Feature
- What are eSignature Envelopes?
- eSignature Checklist: The Prerequisites to create a new Envelope
- How to set up Advanced eSignature Envelopes Step-by-Step
- How to add an eSignature Envelope to a form
- eSignature Automation Trigger
- Viewing Completed eSignature Envelopes
- Resending eSignature Notifications
- Canceling eSignatures
- FAQs
- Forms
- Formulas and Calculated Fields
- Front Page
- Incentive Design
- Milestones
- Project List Columns
- Project Summary
- Project Views
- Roles
- Workflow
- Administration
- Tools Menu
- Integration Guides & API
- PowerClerk Video Guides
-
- Setting up Roll-up Reports
- New User Video Guide
- Configuring Forms
- Roles and User Administration
- Setting up Business Days
- Formulas and Advanced Visibility Rules
- Visualize Workflows
- Dashboards
- ArcGIS
- FormSense
- API
- Edit Forms - Tutorial #1
- SFTP Automatic Data Import
- Calculated Fields
- Web Connector Setup
- Build A Formula
- Milestones
- Edit Forms - Tutorial #2
- Project Summary
- Automation with Formulas in Action Rules
- PowerClerk Program Launch
- PowerClerk User Group Sessions (UGS)
- Learning Management System (LMS)
- Join us for Reflow!
- NEW: PowerClerk Certifications
ePayments
Streamline credit card payments for application fees with secure payment processing.

Questions to ask yourself about ePayments:
What payment provider can I use in PowerClerk?
How do I calculate my fees with Formulas?
Where do I see a report of my ePayments?
How do I set up my Stripe account?
How can I tell if my customer made their payment?
Locating the ePayments History feature
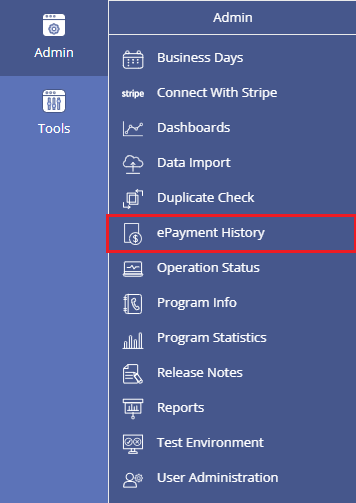
Anyone in a Role with the ePayments privilege to edit Forms in a program with ePayments enabled can add ePayment functionality to Forms and can visit a log of past payments by opening the ADMIN menu and clicking on ePayment History:
How to add ePayments
ePayments
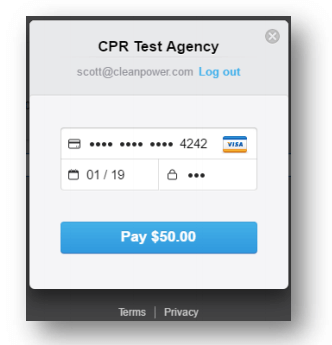
PowerClerk supports integrated ePayments via secure integration with Stripe (www.stripe.com). Stripe integration is the default and preferred ePayment option in PowerClerk. In addition to Stripe, we have incorporated Paymentus and KUBRA EZ-PAY. The ePayments feature is fully integrated into PowerClerk’s Forms, Workflow, and more to enable the Program Designer to determine which Form(s) require payment and whether payment is required in order to submit the Form(s). Transactions are processed in seconds (via iFrame – see Figure 1 below) without the need for the user to navigate away from PowerClerk to pay. Payment confirmation is presented to the payer and the Administrator in real time in the PowerClerk web user interface. Automatic notifications are sent to the payer in real time (and can be sent to the Utility if needed), and payment status reporting can be run from Stripe which provides real time results as well.
Clean Power Research is not directly involved in the transaction. The PowerClerk utility/agency establishes a Stripe account, which includes provisioning of a merchant account, in minutes. Credit card payments from applicants (less fees) will be deposited directly into the merchant account. Credit card transactions are between the applicant and the PowerClerk utility/agency customer; the funds never touch any Clean Power Research bank account. CPR will have neither visibility nor access to the merchant account. The PowerClerk utility/agency customer is responsible for transferring funds out of the merchant account into the account of their choosing, and transfers can be as frequent as rolling two-day basis. The PowerClerk utility/agency customer tracks incoming payments, issues refunds as needed, and manages transfers and reporting all from their Stripe account. Use of ePayments involves transaction fees by the payment platform (Stripe) and Clean Power Research.
Stripe’s transaction fees ($0.30 + 2.9% per transaction) are levied directly against each transaction amount during processing. For example, for a $50.00 ePayment charge, $48.25 will enter the merchant account, and $1.75 will go to Stripe. PowerClerk’s ePayment fees can be flat (fixed amount) per Form, or Formulas can be used to dynamically calculate the application fee amount.
The sole payment method available via the ePayments feature today is credit card.
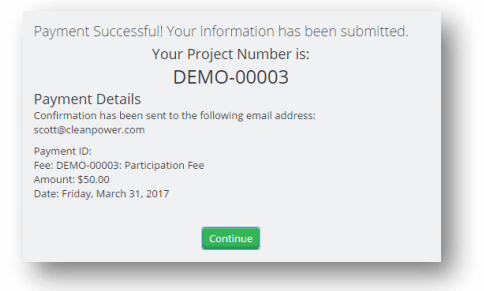
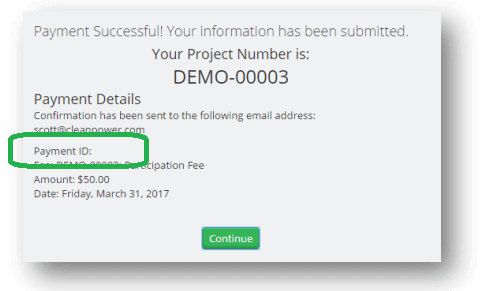
PowerClerk provides an ePayment tab as the last page of any Form for which ePayments has been enabled. This will encapsulate the credit card information and pre-payment confirmation experience. This will take over the “Submit” experience of a Form (as in the Form with required ePayments cannot be submitted until payment is complete) and provide a payment confirmation summary upon completion of the payment process.
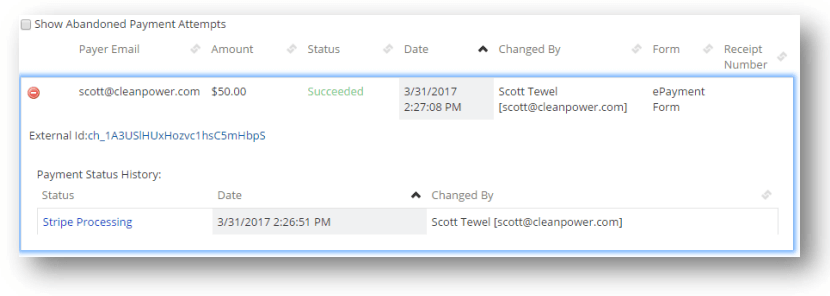
Stripe provides PowerClerk a transaction identifier for each transaction to make it easy for the Admin to track payment history per project from the Admin page (see Figure 3):
How to set up ePayments
To process Stripe payments through PowerClerk you will need to connect the Stripe account to your production PowerClerk program. This process entails the following steps outlined below. Once the accounts are connected you will need to configure your payment forms so that ePayments are enabled.
Stripe Dashboard:
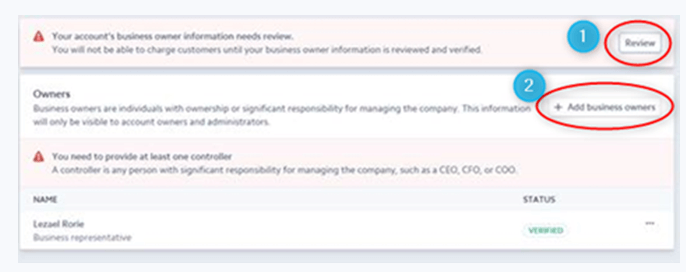
- To Connect the Stripe account to your PowerClerk program:
- Log in to PowerClerk and Stripe
- From the Admin page, select “Connect with Stripe”:
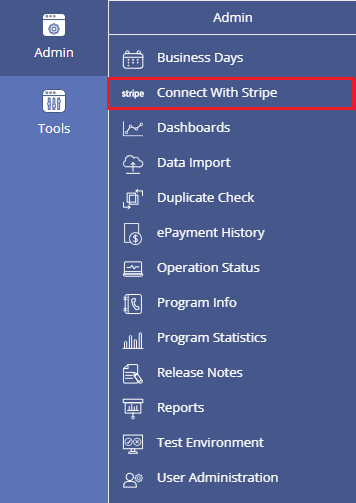 Figure 6: Connect with Stripe
 - Click the button to “Connect with Stripe” and follow the instructions:
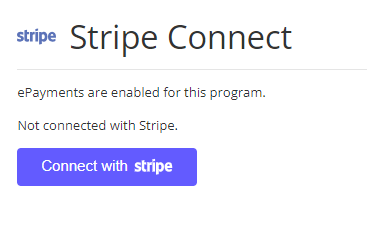 Figure 7: Connect with Stripe Button
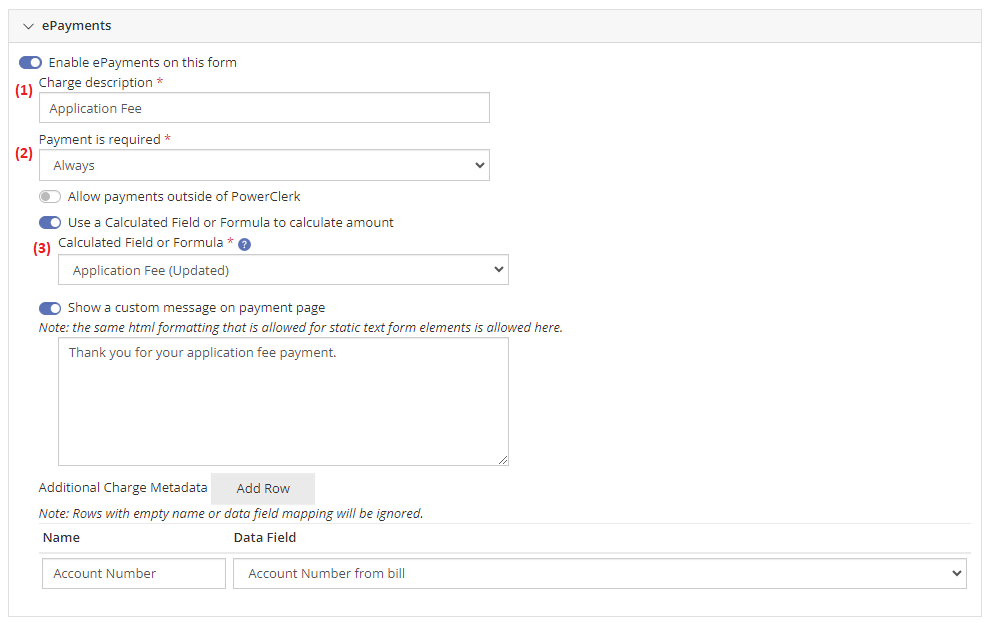
- After you connected with Stripe, please select from the Forms page the form you wish to enable ePayments for and click on Configure Form:
- Enter a Charge description (optional)
- Determine when payments are required (Only the First Time Form is Submitted or Always)
- Select the Calculated Field to calculate the amount

Then follow these steps to complete your Stripe setup:
FAQs

For example you can round a decimal value of 100.12345678999 to 3 digits after the decimal sign by using {data: datafield,,3} which will then display in your Document Template as "100.123". This won't effect the data fields actual value stored within the database, where you will retain the full standard precision of 10 digits after the decimal sign.
- Create Account: Register at Stripe (Link: https://dashboard.stripe.com/register).
- Email Verification: Once registered, verify your email address by clicking the email verification link sent to the email used to sign up for the account.
- Activate Account: Activate your account by using the "Activate Account" option in the left-hand sidebar.
- Business Details: Enter jurisdiction name and Tax ID (TIN).
- Industry: Select "Government Services" under "Professional Services." Please ensure to set up your account as “Non-Profit”. When asked for your Social Security Number (SSN) for set up, please let Stripe Support know that you need to escalate your account set up to another department within Stripe that handles government identification and verification. Access the "Stripe Support" tab in the top right corner of the website. Indicate that you are a government entity attempting to set up an account without a Social Security Number. The support team will request additional information to verify your authorization to establish the account. Be prepared to provide the supplemental details they may ask for:
- Stripe Support Link: Business types
- Stripe Support Link: Tax ID verification
- Stripe Support Link: Documents for business verification
- Stripe Support Link: Supporting documents
- Stripe Support Link: Acceptable verification documents
- Stripe Support Link: Using IRS documentation
- Business Owners: Choose option "Continue with no owners."
- Fulfillment: Indicate "No" for selling of physical goods and select option "Within one day" for service delivery time.
- Statement Descriptor: Enter jurisdiction name for credit card statements and ensure the name you chose is easily identifiable to avoid potential chargebacks.
- Bank Details: Input routing and account number.
- Two-Step Authentication: Set up SMS or app authentication.
- Final Submission: Review and submit your entered data on the Summary page to complete your Stripe account creation.
Have additional questions? Contact us to nominate your FAQ and help others find answers to your own questions concerning this feature.
Create A Support Ticket
Not finding your answer here? Submit a question to our support team at the PowerClerk Ticket System and leverage the PowerClerk team’s expertise.