Data Import
Update existing project’s data values to create new projects, perform actions, and keep your reporting holistic to reduce dependency on multiple data sources.

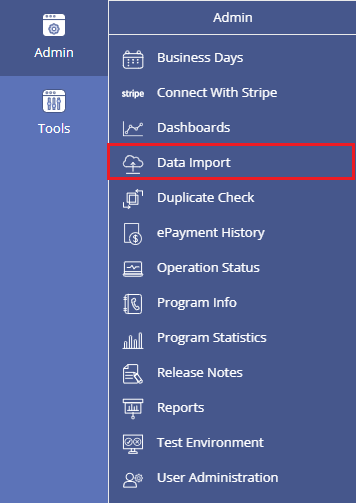
Locating the Data Import feature
Anyone in a Role with the Validate Data Import privilege or the Run Data Import privilege can use the Data Import feature by opening the ADMIN menu and clicking on Data Import:
Steps to Complete a Data Import
Step 1: Creating a Data Import File
PowerClerk allows users to run a Report and download a .csv file with project data. Admins can then turn around and utilize that same .csv file to import project data into PowerClerk. The .csv file will need to include certain column headers that are formatted in the way PowerClerk expects to receive information. The .csv file should be formatted so that the first row is the column header and each subsequent row is a different project’s data.
First, to modify projects’ data field values, identify the data fields and their template tags. Navigate to Program Design>>Data Fields and select a data field to see the template tag along with a clickable copy button. Copy the template tag and paste into the .csv file as a column header. Alternatively, download all the template tags relating to a particular Form via the Export for Excel button for that Form. When using the Export for Excel button, simple forms with no conditional visibility or required fields will create the most effective import template. Please see more information in the “Column Header Types” section, below.


Step 2: Validating a Data Import File
To validate a Data Import .csv file, the user must have the “Validate Data Import” privilege turned on for their Role. The successive privilege, called “Run Data Import”, gives users the ability to complete data imports that modify existing projects.
When you are ready to import your .csv file, navigate to the Data Import page. Select whether you wish to “Modify existing projects” or “Create new projects” and then upload the file.
The identify column is the column in your .csv file that PowerClerk will use to identify which project to target for each row of data. You may select whether you wish to put all projects included in the .csv file into a specific status. You may also select whether the data import file is meant to target a form. Please see the “Data Import Configurations” section, below, for more information.
Once you have your parameters set up, you will click the blue “Validate” button to process the .csv file. Validating is a required step prior to importing the data. PowerClerk will verify that the column headers are correct, and that the information is properly formatted based on the data field type.
If the validation returns no errors, you will see a green “Validation Succeeded” message from PowerClerk.
If the validation returns errors, PowerClerk will display which rows or columns have errors so you can easily correct the .csv file and the associated formatting. Once corrected, you will need to remove the originally uploaded file, re-upload the newly saved file, and click the “Validate” button again.

Step 3: Performing a Data Import
If you are modifying existing project data, and your Role has the “Run Data Import” privilege, you may perform the data import after a successful validation by clicking the “Import Data” button.
To create new projects in your Production environment, you will need to send a Support Request to the PowerClerk Support Team to process your import. Within a Test Environment, you can run a data import to create new projects. Please see more information in the “Data Import Configurations” section, below.
To send communications in bulk via a data import, you will need to send a Support Request to the PowerClerk Support Team to process your import. Please see more information in the “Column Header Types” section, below.
Data imported into the Test Environment will be deleted when the Test Environment is committed or discarded. By importing your own data into a Test Environment, this allows you create test projects. For the security and privacy of your customers, we strongly recommend that you do not import real customer data into non-production environments (i.e. Sandbox aka PCITrial).

Data Import Configurations
Modify Existing Projects
PowerClerk users with the permission to run data imports will be able to validate and run the import directly to modify existing projects. The import process allows the user to optionally update the project status or target the form. For additional information on changing the status and the Target Form, please see below.
Create New Projects
Projects can be created via a Data Import by a PowerClerk User in a Test Environment. To have a project import initiated in the live Production instance, please submit a ticket in the PowerClerk Ticket System. For additional information on what to include in your Support Ticket, please see section “Creating Projects in Production” below.
Projects can also be created programmatically through the PowerClerk API using the CreateNewProjects method. Additional details are available in the PowerClerk API documentation linked here.
Change Status
When modifying projects, there are two ways that the user can change the project status.
- Directly on the Data Import page: To change the status of all projects included in the file, simply select the desired target status during the Import. When the imported projects are moved into the target status, any automations triggered by that status change will run. This includes automations triggered by projects exiting their current status, transitioning between specific statuses, and entering the target status, with the exception of any communication action rules.
- On the Import CSV: Include a column that uses the template tag {CurrentStatus}. When including this template tag, the automation status trigger will be ignored. For additional information on the {CurrentStatus} column header, see below ‘Column Header Types’.
The date on which the import is performed will be recorded as the Status Change date for reporting purposes.

Target Form
To modify existing projects, a Target Form can be optionally configured so that a form submission is created for each project included in the import file. To create new projects, a Target Form is required. It is recommended to use the simplest possible form for this process.
There are, however, specific restrictions on which forms are eligible to be submitted through a data import:
- The form cannot have any conditionally visibility configured
- The form cannot have any elements with eSignatures configured
- The form cannot have ePayments enabled
- The form must be configured as an administrative form.
- Any required fields on the target form must appear as columns in your import file
- Any read-only fields on the form cannot appear as columns in your import file
When PowerClerk processes each project (i.e. row) in your import file, it first saves the imported data, then attempts to submit the target form, processes any automations associated with that form submission*, and finally changes the project status (if configured on the CSV).
If the form submission automation contains a validation rule that fails for a given project, the project data will still be updated based on the values in the import file, but the form submission and any associated automations will not occur.
If a target status is specified in addition to a target form, the status change is applied after the form submission is processed. Therefore, if the form submission triggers an automation that updates the project status, there is no need to select an additional status during the import, and the selector can remain at the default value: “ “- None – leave in present status”. Additionally, the status change will run any additional automations associated with the status change*.
*Automations will be processed, but any “Send Communication” action rules will be ignored.
When targeting a specific Form with a data import, that submitted form will be shown in the Previous Forms section under the View/Edit screen.
Please note: When importing into a specific form, PowerClerk requires that *all* required data fields on the form be included as columns in the .csv file. If any required field is missing, the import validation will flag the file as incomplete. This applies even when modifying existing projects, regardless of whether the project already contains values for those required fields; each required field on the target form must still be represented in the import file. This is a key reason why using a simple form as the target for data imports is recommended, as it helps prevent the .csv file from failing validation

Creating Projects in Production
Creating projects in Production can only be completed by a CPR Admin. To initiate a project import, please submit a ticket in the PowerClerk Ticket System. To designate a project as historical or legacy, we recommend creating a PowerClerk checkbox data field and populating it during data import for any project that qualifies as legacy.
Please note that the Support Team will create empty shell projects; the utility will then be responsible for populating those projects by performing a Data Import to Modify Existing Projects.
To streamline project creation, please include the following information in your Support Ticket:
- The total number of projects to be created.
- Project numbers (Optional)
- Project Numbers are optional, as PowerClerk will automatically assign them sequentially. If you choose to include them, follow the next available number based on the most recently created project.
- Please Note: If the Project Number is already in use, the import file will not successfully validate.
- A Target Form to import into
- To streamline project creation, we recommend setting up a backend form with a non‑required data field and preparing a CSV that targets this form. We will utilize this data field to import a blank value.
- The CSV file for import. The CSV should include:
- One data field from the target form
- The project numbers (Optional)
- The desired project status (Optional)
- The project owner (See 7 below)
- We recommend validating the data import prior to sending the file to the Support Team to reduce corrections.
- The intended project status:
- This can be specific directly in the CSV or provided directly to the support team as the status the newly created projects should be placed in. Please note that all status automations, with the exception of communications, will run. If no project status is specified, the project will default to the ‘Unsubmitted’ status.
- Please Note: The support team can import historical status timestamps. Be sure to include this request in your initial ticket; otherwise, the import will default to using the date the data import is completed.
- The Project Owner
- Please include the First and Last name as well as the PowerClerk user email. If no project owner is specified, the ticket submitter will be assigned as the Project Owner by default. For additional information on the Project Owner Column headers, please see the section ‘Column Header Types’ below.
Once the Support Team creates these shell projects, they can be modified and populated with data through subsequent data imports. Please do not include any PII data fields in your CSV to the support team.
Please note: Projects in Production cannot be removed or replaced once created.
Column Header Types
Project Number: Most often, the Project Number is utilized as the identifying column for PowerClerk to target a project for each row of the .csv file. However, there other options, as described below.
Data Fields: Data Fields must be formatted in the way that PowerClerk is expected to receive the information. For example, if the data field is an “Integer” type, then the .csv file column will accept digits only (not letters). The template tags for the data fields can be found on the Data Fields page to use as column headers (refer to Figure 2, above).
- Text Data Fields: freeform text values
- Numeric Data Fields: numeric values as expected
- Multiple Choice & Drop-Down: values need to match the Choice values exactly and are case-sensitive
- Date Fields: values should follow short format MM/DD/YYYY for programs in English language
- User Selector: value should be the user’s email address
- Please Note: The template tag for this data field element will be: {data: user selector element field name}
- Please note the PV System and ESS Form Elements cannot be imported into. Use PowerClerk’s API instead; specifically the SetProjectData method reference.
Tables: A .csv file can be set up to add a row to a Table Data Field. Per data import, only one row per project may be added. If you need to add multiple rows to a single project, you will need a separate .csv file per row.
Each column of the table has its own data field template tag, which follows this schema:
- {data: <TableName> <ColumnName>}
For more information on tables, please visit our Data Fields page.
Note: If you require the ability to modify existing table rows or add more than one row at a time, you may utilize the PowerClerk API.

Status Changes: The current status of a project can be selected in the data import UI configuration menu or included within the .csv file itself. To include the Current Status in the .csv file, utilize the following column headers:
- {CurrentStatus}
- {status_date: StatusName}
If you have different projects going into multiple statuses, you will need a status date column for each defined status.
Note: When the target status for imported projects is specified with a {CurrentStatus} column, no automations will be triggered by the status change. If you would like the automations to run, select the current status through the data import UI configuration menu instead (see section above).
Project Owner Change: You can reassign the project owner of projects via a data import. Please ensure that the new project owner is a user registered to your program. If the user is not currently registered to your program, you can add them under Admin>>User Administration.
- {ProjectOwnerFirstName}
- {ProjectOwnerLastName}
- {ProjectOwnerEmail}
Note: If the user is not registered to your program, the Project Owner will still be assigned and PowerClerk will create a new account for the new PO, generate a random password for their account, and assign the user a non-Admin role in your program. Carefully consider this experience when changing the project owner of projects.
Sending Mass Communications: To trigger sending a Mass Communication across a subset of projects via Data Import in bulk, please format your import .csv file as shown in the example below.
You will need to set up the .csv file such that it successfully validates. Then, visit the Announcements page to learn how to create, trigger, and manage your Announcement topics.

Please review our policy on mass communications here prior to performing a data import.
Deadlines: You may SET or SATISFY a deadline via data import.
To satisfy a deadline, please format your import .csv file as shown in the example below, utilizing the tag {deadline: DeadlineName} and “satisfy” in the project rows:

To set a deadline and its expiration date, please format your import .csv file as shown in the example below:

You can choose to set an expiration date of your choice or utilize the keyword “default” to set the default deadline expiration date as configured in Program Design>>Deadlines. Set deadline expiration dates must be a future date as past dates would have expired already.
Please note: To avoid setting duplicate Deadlines you may want to consider configuring the Deadline option “Allow only one instance for each project” option under Program Design>>Deadlines, or ensure that you satisfy existing deadlines first before setting a new deadline.
Automatic Data Imports via SFTP
PowerClerk can automatically data import a .csv file if you can design a way to drop said file into CPR’s Secure File Transfer Protocol (SFTP) site hosted in Amazon Web Services (AWS). The .csv file will need to be formatted in the same way manual data import .csv files are. You may choose to target a form or change a project status. If you target a form, the same rules apply, and the automations associated with the form submission will run.
Please note: To target a form in an automatic Data Import, include an additional column header with the Template Tag {form: <Form Name>}. No additional data is needed under this column in the import file.
Watch our Video Guide on SFTP Automatic Data Import’s below.
PowerClerk will attempt to import the .csv file within an hour of it being placed in your designated program folder. If the .csv file was successfully imported, the file will be removed from the folder. You may check for a successful import by navigating to the Data Import History tab:

The ‘user’ that performs automatic data imports utilizes the alias “PowerClerk Internal Processing” within the PowerClerk UI.
An automatic data import may fail to process for one of three reasons: the validation failed, the data import failed, or the file was unprocessed*. In the case that a file fails to process, PowerClerk will rename the file with the issue suffixed (I.e., failed validation). Your Support Alias (Program Design>>Program Info) will receive an email notification and you will be able to navigate to your designated SFTP folder to review your file.
*PowerClerk will not accept a file whose last write timestamp was more than 24 hours prior to the import scan. For example, a file may be in the queue for longer than 24 hours if other files are being processed to that program. Our policy safeguards projects from receiving outdated and no-longer-valid data as you may have uploaded a newer file with updated information to be imported as well. If this happens, PowerClerk will rename the file with the suffix “unprocessed” and your support alias will be notified.

If you would like to set up an automatic data import for your program, please submit a ticket to the PowerClerk Ticket System.
Revert Data Import
Once you complete your data import, it is possible to revert the data back to its original values. To do this, click “Data Import History” at the top of the page.

Once on the ”Data Import History” page click ”Download Import Snapshot File” to download a .csv file of the original targeted data values prior to the data import.

To revert the data back, conduct a second Data Import with the downloaded snapshot file. This snapshot file is available for 30 days after any import.
Please note: The data originally imported will still display in the Data History of the project.
Video Guides
Data Import
This video guide will show you an introduction to automatic data import via SFTP.
A full list of all Video Guides can also be found here.
FAQs
Choice value: Yes
Accompanying choice label: "Yes, please sign me up to receive further communication about this process"
In your reports this drop-down field would be emitted as "Yes" and also please note that when importing into such drop-down field, you would have to match the *choice value exactly* meaning importing a lowercase "yes" would fail, and only a proper choice value match of "Yes" will achieve the desired outcome of the import.
- Please contact PowerClerk's Support Team by creating a new ticket in the Ticket System to request account credentials for PowerClerk's SFTP server. You can then use these credentials to auto-upload properly formatted import files to PowerClerk's SFTP server.
- Once you have an SFTP account, you will find a “ProgramID” folder that will correlate to your PowerClerk program ID (e.g. there would be a folder like ‘ZEZ0C8KV4YH5’ that correlates to the ProgramID portion of the URL to your program e.g. https://support.powerclerk.com/MvcProjects/ProjectList?ProgramId=ZEZ0C8KV4YH5)
- PowerClerk checks all program folders on the SFTP server every hour upon the hour, and if there is an import file present, then PowerClerk will go ahead and import that file to the respective program.
- Successful automated imports will also trigger an entry visible under the Data Import >> Data Import History tab (the respective imports show as Imported by: PowerClerk Internal Processing).
- Any failed import attempts are displayed under the Data Import >> Data Import History tab as well, and you can also receive an email notification upon such failures if you setup the notification portion visible under Admin >> Program Info within PowerClerk section ‘Other Support Settings’

As values for this column please enter the existing email addresses of valid PowerClerk accounts available in your program. Please note: For project ownership changes it is also mandatory to include column headers "{ProjectOwnerFirstName}"and "{ProjectOwnerLastName}" with their respective values. Once your import file is ready, please validate it and import your import file to bulk edit project ownership or assignee changes.
- Allow you to dictate the Current Status project-by-project.
- Offer the opportunity to provide different timestamps, under Current Status, for reporting purposes.
- Will not run any Automation associated with this status change.
- Change the Current Status of all the projects within the .csv file.
- The timestamp of the Current Status will be the date & time the import was completed.
- Will run any Automation associated with this status change, except for “Send Communication” action rules. This includes Automations triggered by projects exiting their current status, transitioning between specific statuses, and entering the target status.
Have additional questions? Contact us to nominate your FAQ and help others find answers to your own questions concerning this feature.
Create A Support Ticket
Not finding your answer here? Submit a question to our support team at the PowerClerk Ticket System and leverage the PowerClerk team’s expertise.