Formulas and Calculated Fields
Use Formulas to perform calculations in Forms that assist applicants and increase data accuracy.

Questions to ask yourself about Formulas:
Are there parts of the program application where providing in-form calculations would increase the accuracy of data inputs (like showing an applicant their long-term average PV energy output)?
Are there Data Fields that need to be calculated or created for certain Reports or Dashboards?
Which Forms do require calculations that can be handled by Formulas?
Should a Formula result trigger an Automation?
Do you have elements on forms that should only be displayed based on a Formula result?
Locating the Formulas feature
Anyone in a Role with the Edit Formulas privilege can edit Formulas by opening the PROGRAM DESIGN menu and clicking on Formulas.

How to work with Formulas and Calculated Fields
The Formulas feature has been designed to enable operations to be performed automatically by PowerClerk by using references to Data Fields and constants. These can be used to create logical conditions such as to selectively run Automation action rules, create Validation rules for Automations, create Conditional Visibility rules, and much more. An intuitive drag-and-drop Formula editor is used to configure Formulas.
Calculated Fields are different than Formulas in that they are discreet Data Fields. This means that unlike Formulas, they house the data result of the Formula as a part of the project record. This allows the calculated results to be displayed real-time on Forms, to be used in Project List Columns, or to run local calculations for the purpose of more detailed Reporting.
Formulas can perform numeric operations (E.g. addition, subtraction, multiplication, division, etc.), Boolean operations (greater than, less than, is equal to, is same as, is not same as, etc.) on numeric data fields, and can also perform Boolean operations (is equal to, is not) on Boolean data fields (true/false). PowerClerk can also run calculations that result in a Date data field and run specific operations on Multi-Instance data fields such as tables. A few examples have been provided in Figure 2 and Figure 3 below. The top-right of the formula editor will tell you the data type that the formula result will be in.


Once a Formula has been saved, you can create a Calculated Field (Fig. 4) to use on your Forms, as Project List Columns, or in a Report. The definition of a Calculated Field cannot be edited. Additionally, any changes to the original formula after the Calculated Field’s creation will not be reflected in the Calculated Field, and a new one will need to be created. If editing a calculated field is needed, you must select “Copy to New Formula”, edit the newly created formula, and then create a new Calculated Field from the newly edited formula.
In the example in Figure 5 below, the Calculated Field created from the Formula comparing Estimated Annual Production to Historical Annual Consumption (kWh) designed in Figure 3 above populates the result automatically in the Form and updates automatically as data field values change.


Formulas can also be used within Automations to trigger Action Rules as shown in Figure 6 below:

Formula Data Dictionary
Supported Data Types (Input):
| Color | Data Type | Reference |
|---|---|---|
 |
Blue accepts Numeric inputs | Numeric constant or Data Field Reference types (integer, decimal, price) |
 |
Orange accepts Boolean inputs | True, False, (Multiple) Choice, Drop-down List, Attachment Approval/Rejection or Data Field references types which return a True/False result (Checkbox, Boolean Calculated Field Result) |
 |
Green accepts Text inputs | Text String or Text Data Field reference types (Single Line Text, Paragraph Text, Email, or Contact Data Fields) |
 |
Purple accepts Date inputs | Date or Date Field reference |
 |
Black accepts Dynamic inputs | Formula reference types (Numeric, Boolean/Relational, Text, Date) |
| Additionally, inputs can also accept formula operations that match their respective data types. | ||
Supported Formula Operations (Output):
| Numeric Operations (Returns a Numeric result) |
||
|---|---|---|
| Operator | Name | Description |
 |
Addition | Adds two values |
 |
Subtraction | Subtracts two values |
 |
Multiplication | Multiplies two values |
 |
Division | Divides two values |
 |
Contant | Can contain any Numeric value (defined within formula) |
 |
Can reference any Numeric Data Field | |
 |
Compares sets of data and tests the results: If the results are true, the THEN instructions are taken If not, the ELSE instructions are taken e.g. If (A = TRUE), Then B, Else C |
|
 |
Min | Returns the smallest value from the two Numeric values provided e.g. (1,2) = 1 |
 |
Max | Returns the largest value from the two Numeric values provided e.g. (1,2) = 2 |
 |
Exponent | Represents how many times a Numeric value is multiplied by itself e.g. (2^5) = 2 x 2 x 2 x 2 x 2 = 32 |
 |
Log | e.g. Log (1000) = 3 (10 x 10 x 10 = 10^3 = 1,000) |
| Relational Formula Operations (Subset of Boolean Formula Operations that tests a relationship and returns a True/False result) |
||
|---|---|---|
| Operator | Name | Description |
 |
Equal To | Accepts a Numeric or Text input |
 |
Not Equal To | Accepts a Numeric or Text input |
 |
Greater Than | Accepts a Numeric input |
 |
Less Than | Accepts a Numeric input |
 |
Greater Than or Equal To | Accepts a Numeric input |
 |
Less Than or Equal To | Accepts a Numeric input |
 |
Is Before/After | Accepts a Date input |
| Logical Formula Operations (Returns a True/False result) |
||
|---|---|---|
| Operator | Name | Description |
 |
And | True if and only if both conditions are true |
 |
Or | True if either condition is true (or if both are true) |
 |
Not | Changes true to false, and false to true |
 |
True | Constant of true |
 |
False | Constant of false |
 |
References a Checkbox Data Field or Boolean formula result | |
 |
Determines if an Attachment is approved by an administrator | |
 |
Determines if an Attachment is rejected by an administrator | |
 |
References a Multiple Choice Data Field & looks to see if the Data Field is equal to the designated choice in the argument | |
 |
References a Multiple Choice Data Field & looks for if the Data Field is not equal to the designated choice in the argument | |
| Text Formula Operations (Returns a Text result except for the Length of Operation, which returns a Numeric result) |
||
|---|---|---|
| Operator | Description | |
 |
References any Text value entered | |
 |
References Single Line Text, Paragraph Text, Email, or Contact Data Fields | |
 |
Compares Boolean Data field or Formula result and tests the Text results If the results are true, the THEN instructions are taken If not, the ELSE instructions are taken e.g. If (A = TRUE), Then B, Else C |
|
 |
Determines the length of a given Text value and returns a Numeric value e.g. Length of (PowerClerk) = 10 |
|
 |
Combines two Text values and returns a concatenated Text string e.g. “potat” + “oes” = “potatoes” |
|
 |
Enables referencing the respective project number (e.g. “CPR-00123”) within a Formula | |
 |
Reference non-string Data Field types such as Numeric, Boolean, Choice, and Date Data Fields as text representations enabling usage of non-string Data Fields in context of any of the other Text Formula Operators (e.g. IF/THEN/ELSE, LENGTH OF(), CONCATENATE) |
|
| Data Formula Operations (Returns a Date result) |
||
|---|---|---|
| Operator | Description | |
 |
References a designated Date constant | |
 |
References a Date Data Field | |
 |
References a Numeric value before/after a Date or Date Data Field reference e.g. (7) days after (Date) | |
 |
References a Boolean Data Field or Formula result and tests the Date results. If the results are true, the THEN instructions are taken If not, the ELSE instructions are taken e.g. If (A = TRUE), Then B, Else C |
|
| Formula Reference Operations (Returns a result based on the primary operation) |
||
|---|---|---|
| Operator | Description | |
 |
Place a Formula reference within any other Formula operator to avoid having to create multiple layers of complex Formulas:  |
|
| Multi-Instance Formula Operators (valdation of multi-instance fields to ensure all field instances adhere to the desired criteria) |
||
|---|---|---|
| Operator | Description | |
 |
Returns Boolean True if all instance values across the entire multi-instance field match, or False if not. | |
 |
If all values across the multi-instance field match, returns that exact single value (whether that value is Numeric, Text, Boolean, or Date). | |
 |
Returns the summation of all values across a multi-instance field of Numeric data type. | |
 |
Provides an integer value (e.g. 1, 2, or 3, etc.) based on the number of Boolean (e.g. Checkbox) “True” values are found across the multi-instance field. | |
 |
Provides an integer value (e.g. 1, 2, or 3, etc.) based on the number of matching Text (e.g. Single Line Text) values that are found across the multi-instance field. | |
Dynamic Formula References
Use Dynamic Formula References to simplify complex Formula expressions by referencing existing Formulas as components (or Formula segments) of the larger Formula. My defining simple formulas first, these can then be “nested” into a larger formula to create more complex definitions.
To reference a Formula within another Formula, please use the Formula Reference operand that is listed under the “Dynamic” section in the Formula editor:

The Dynamic Formula Reference operator itself is not designated to return a Numerical, Boolean, Text, or Date result. Once a Dynamic Formula Reference operator is placed into a Formula container, the operator will turn into the respective data type. Then, a list of the available Formula Reference Expressions (matching the respective data type) will be displayed under the Properties tab on the right-hand side of the editor.
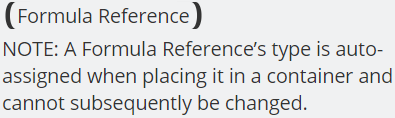
Please Note: Formulas can also reference Calculated Fields. Currently only one level of reference is supported (i.e. you cannot reference Calculated Fields that reference other Calculated Fields).


Rules of Formula References
- Incomplete Formulas cannot be referenced.
 Figure 8a: Formula Reference Rule 1
 - You cannot create circular Formula References.
 Figure 8b: Formula Reference Rule 2
 - A Formula Reference cannot be the only component of a Formula.
 Figure 8c: Formula Reference Rule 3
Completed Formulas that incorporate Dynamic Formula References may be used to create Calculated Fields. Please note: Once the Calculated Field has been created, any Formula Reference is fully resolved into the Calculated Field and indistinguishable from other Formula components.
When the Calculated Field is included on a Form, and configured to “Show Details” (as shown in Figure 9), each individual component of the Formula will be displayed as any prior Formula References have been flattened into the Calculated Field.


Advanced Visibility Rules
If you need to create an advanced visibility rule (see Forms), you first must start by defining a formula with a Boolean result. That formula can then be referenced to create your Advanced Visibility Rule (Fig. 10). Please note that if you change the Formula being referenced after it has been utilized for Advanced Conditional Visibility, you must remove and re-select the formula for the new conditions to take effect.

Video Guides
Build A Formula
This video guide will demonstrate how to build a formula through our visual design surface. Use PowerClerk to calculate key data fields that streamline your administrator workflow.
Automation with Formulas in Action Rules
The following video will present you the concept of triggering Automations based on a Formula’s result:
Formulas and Advanced Visibility Rules
To control the Conditional Visibility of From fields you can use Formula logic to adapt the display of your Forms to a vast variety of business scenarios:
Calculated Fields
Display the results of Formula calculations on Forms, Communications, Document Templates, and Reports. This video demonstrates how to use Calculated Fields within your program:
A full list of all Video Guides can also be found here.
FAQs
 Save your new form by clicking on "Save".


 Please notice how the Boolean operator could only be placed into the orange position within the (IF __ THEN __ ELSE __ ) data type.
 STEP 6c: Repeat this procedure for all other operators and your scratchpad should now look similar to this:


 to enjoy your new calculator:

Have additional questions? Contact us to nominate your FAQ and help others find answers to your own questions concerning this feature.
Create A Support Ticket
Not finding your answer here? Submit a question to our support team at the PowerClerk Ticket System and leverage the PowerClerk team’s expertise.