PowerClerk Support Center
- Project Pages
- Program Design Menu
-
- Automations
- Channels
- Communications
- Connections
- Content Library
- Custom API IDs
- Data Fields
- Deadlines
-
- Questions to ask yourself
- Locating the Deadlines feature
- What are Deadlines
- How to Create a Deadline
- Deadline Automation Action Rules
- Utilizing Project Admin Page for Deadlines
- Communication Templates for Deadlines
- Deadline Set/Satisfy Options
- Program-Wide Deadline Actions
- Reporting on Deadlines
- Deadlines in Project List Columns
- FAQs
- Document Templates
- eSignature Envelopes
-
- Questions to Ask
- Locating the eSignature Feature
- What are eSignature Envelopes?
- eSignature Checklist: The Prerequisites to create a new Envelope
- How to set up Advanced eSignature Envelopes Step-by-Step
- How to add an eSignature Envelope to a form
- eSignature Automation Trigger
- Viewing Completed eSignature Envelopes
- Resending eSignature Notifications
- Canceling eSignatures
- FAQs
- Forms
-
- Questions to ask yourself
- Locating the Forms feature
- How to create and edit Forms
- Adding data fields
- Form Versions and Draft Forms
- Configuring Forms
- Form Field Elements
- Field Properties
- Conditional Visibility
- Sensitive Data Fields
- Location Form Element
- Address Autocomplete
- Exporting a Form to Excel
- VersaForms
- FAQs
- Formulas and Calculated Fields
- Front Page
- Incentive Design
- Milestones
- Project List Columns
- Project Summary
- Project Views
- Roles
- Themes
- Workflow
- Admin Menu
- Tools Menu
-
- My Account
-
- Questions to Ask
- Locating the My Account feature
- How to use the My Account feature
- Lockouts and Password Resets
- Setting up Multi-Factor Authentication
- Missing, lost, or stolen mobile devices: resetting Multi-Factor Authentication
- Disabling Multi-Factor Authentication
- Recovery Guidelines for MFA Administrators
- FAQs
- FormSense
- Grant Access
- Integration Guides & API
- PowerClerk Video Guides
-
- Setting up Roll-up Reports
- New User Video Guide
- Configuring Forms
- Roles and User Administration
- Setting up Business Days
- Formulas and Advanced Visibility Rules
- Visualize Workflows
- Dashboards
- FormSense
- Milestones
- ArcGIS
- Project Summary
- Automation with Formulas in Action Rules
- API
- Edit Forms - Tutorial #1
- SFTP Automatic Data Import
- Calculated Fields
- Web Connector Setup
- Edit Forms - Tutorial #2
- Build A Formula
- Help Articles
- PowerClerk Program Launch
- PowerClerk User Group Sessions (UGS)
- Learning Management System (LMS)
- Join us for Reflow!
- NEW: PowerClerk Certifications
Content Library
Store images and static content for Communications and Front Page visualizations.
Locating the Content Library feature
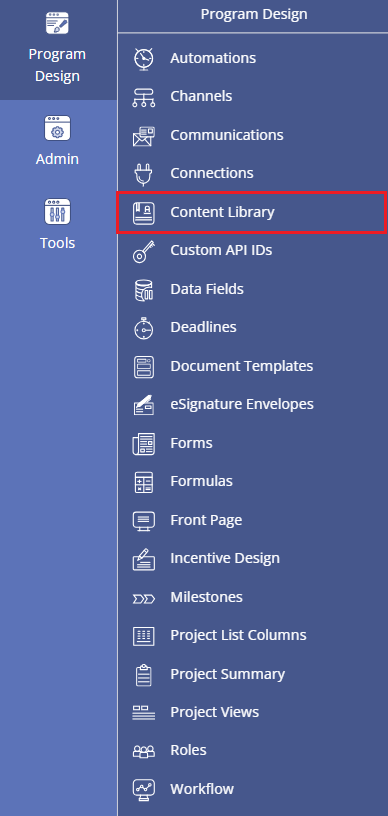
Anyone in a Role with the Manage Content Library privilege can access the Content Library by opening the PROGRAM DESIGN menu and clicking on Content Library:
How to upload content to the Content Library
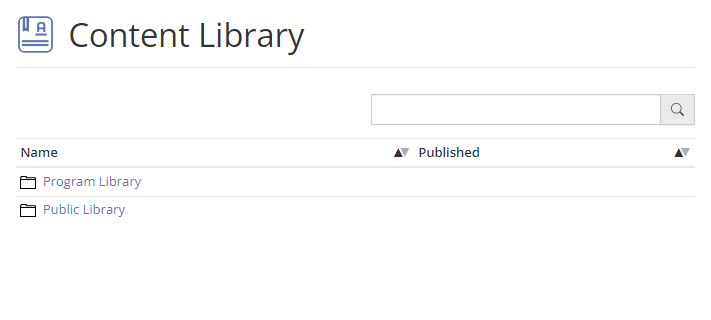
PowerClerk’s Content Library offers two default folders to use for uploading images, media items, brochures, legal disclaimer templates, and other static content (e.g. content that is not intended for project-specific use cases):
- Program Library: This folder is for files that are used as part of PowerClerk internal program design, such as attachments for Communication Templates or images used in Form Elements.
- Public Library: This folder is for files that are embedded in a publicly-accessible context, such as in the text of a Communication Template or the Front Page. Forms with VersaForm configuration should also use the Public Library for content links. Files in the Public Library are accessible by direct links and can be anonymously accessed by any application. Avoid placing any files containing sensitive information in the Public Library.
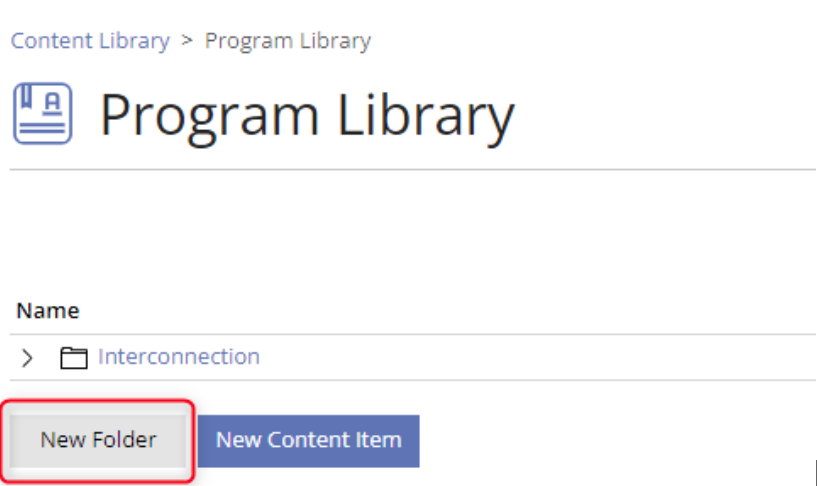
In each folder you can create sub-folders to organize your Content Library:
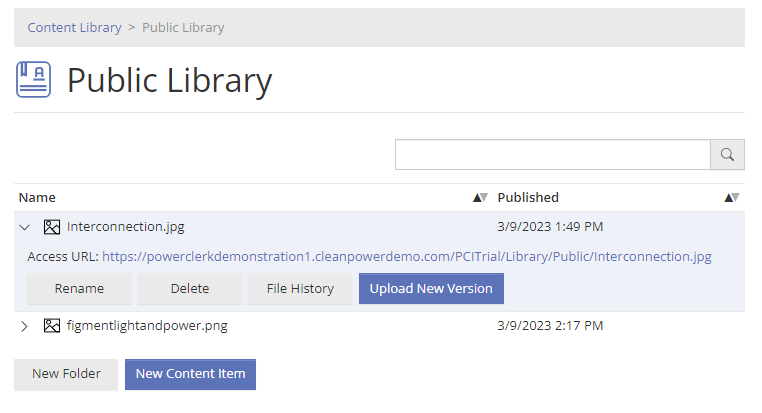
To upload an item to your library, select New Content Item, search for your file, provide a unique and identifiable name, and then select Upload.
Use with Communication Templates
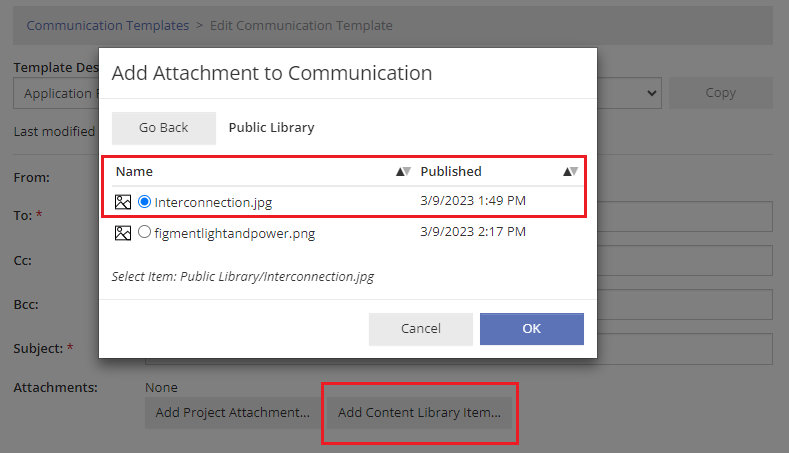
Adding a Content Library item to a Communication Template enables sending out emails to applicants that include images within the message body or to provide brochures and other documents as static attachments.
Adding content as an attachment can be done with the Add Content Library Item… button allowing you to navigate to the Program Library folder to select the respective attachment. Confirm your selection with the OK button:
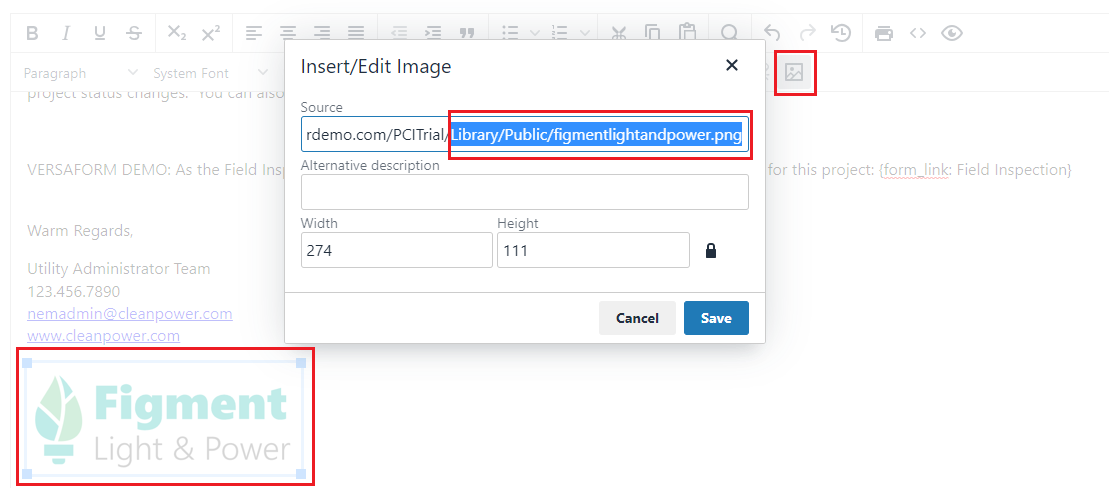
Embedding content within the message body itself (e.g. a logo or an image) can be done via the Communication Editor by pasting the image’s Source link, which can be found for the respective item within the Content Library. Please note: embedded images in outgoing email communications should be stored in the Public Library folder of the Content Library:
Use for Front Page content
Items bound for the Front Page of your program should be uploaded to the Public Library (or sub-folders thereof). Once uploaded to the Content Library please navigate to Program Design >> Front Page to paste the image link copied from the Content Library into the Front Page Editor’s Add Image option and confirm your selection with the OK button:
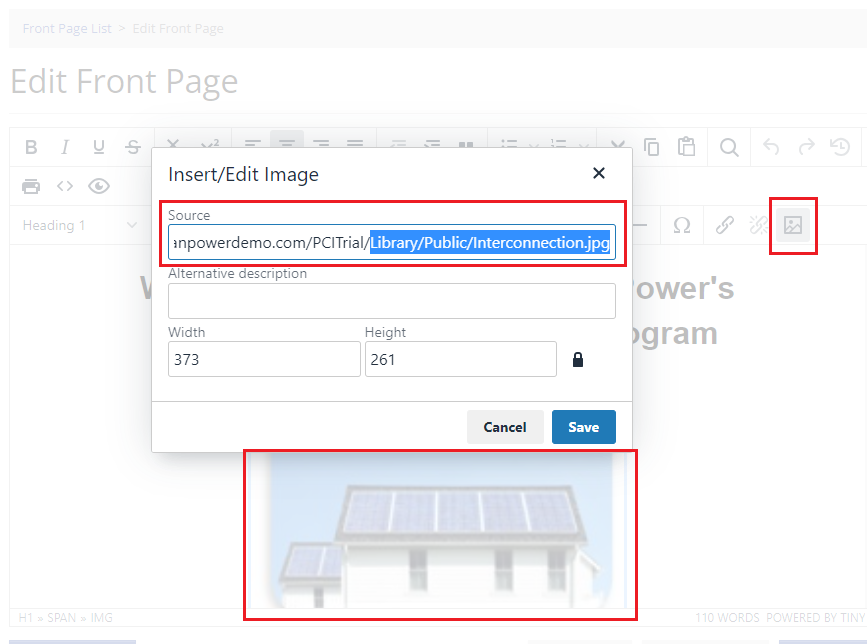
Once all Front Page edits have been applied please publish your Front Page to make your changes go live.
Use for Form Content
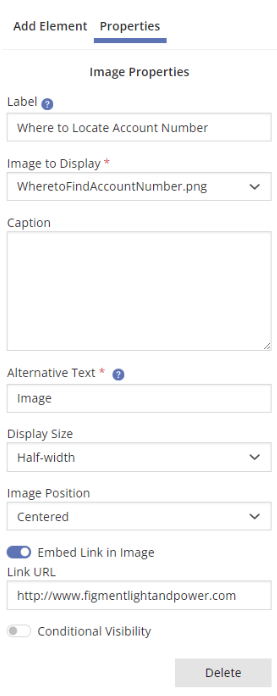
Images that will be embedded on Forms should be uploaded to your Program Library (images intended for VersaForms should be housed in your Public Library). You can add these to your form by selecting the Image element from the Form Editor.
Once you select the image you would like to add, confirm the selected Display Size and Image Position. Optionally, you can add a Label, Caption and Alternative Text. You can also embed a link in the Image, so users can be routed to a webpage when they click on the image.
Content Library Behavior in Test Environments
Any configuration changes involving Content Library items on Forms, Communication Templates, etc. in a Test Environment will be reflected in Production only once the Test Environment is committed. However, if files are added or removed from your Content Library in a Test Environment, they will automatically be added or removed in Production, before the Test Environment is committed. Likewise, if the library is updated in Production when a Test Environment is open, the updates will automatically be reflected in the Test Environment. PowerClerk will not allow you to delete a Content Library item in a Test Environment that is currently referenced in Production.
Video Guides
Would a video guide help to better explain PowerClerk’s Content Library? Contact us and let us know.
FAQs
Have additional questions? Contact us to nominate your FAQ and help others find answers to your own questions concerning this feature.
Create A Support Ticket
Not finding your answer here? Submit a question to our support team at the PowerClerk Ticket System and leverage the PowerClerk team’s expertise.